Recover deleted files Linux and partitions easily – Here’s How!
Have you lost your partitions or deleted any files in Linux accidentally by chance? 🤨
Linux provides effective tools to recover deleted files and Linux partitions. This guide will introduce you to two key utilities: TestDisk, which helps recover partitions and the files contained in them, and PhotoRec, designed for file recovery. These tools are commonly used together since losing a partition often results in losing the files it contains.
Warning: Before taking any action, refrain from copying or saving new files to the affected storage drive. Doing so could permanently overwrite the lost files.
Before diving into recovering, here’s a simple flowchart to help you decide the best Tool for your needs or which Tool you must consider using first:

Table of Contents
Part 1: Recover Deleted Files Linux with PhotoRec
How PhotoRec work to recover deleted files in Linux?
When you delete a file, it’s often not immediately erased from your storage device. Instead, the system may simply remove the reference to the file, making it appear deleted. PhotoRec is a powerful tool that can recover these deleted files. It works by directly scanning the raw data on your storage device, and searching for file headers to identify and reconstruct files, even if the file system is damaged or the file’s metadata has been partially overwritten. PhotoRec then copies the recovered files to a location you specify. This allows you to restore your lost data.
How to install PhotoRec in Linux?
PhotoRec is bundled with TestDisk, and therefore to install PhotoRec, execute the below command to install PhotoRec on Debian-based distributions like Ubuntu:
sudo apt update -y
sudo apt install testdisk
Alternatively, if you’re using RedHat-based distros like CentOS or AlmaLinux, run this command instead:
yum install https://dl.fedoraproject.org/pub/epel/epel-release-latest-8.noarch.rpm
yum update -y
yum install testdisk -y
How to recover deleted files step-by-step using PhotoRec?
- Once installed, open the PhotoRec via the terminal by executing the command:
photorec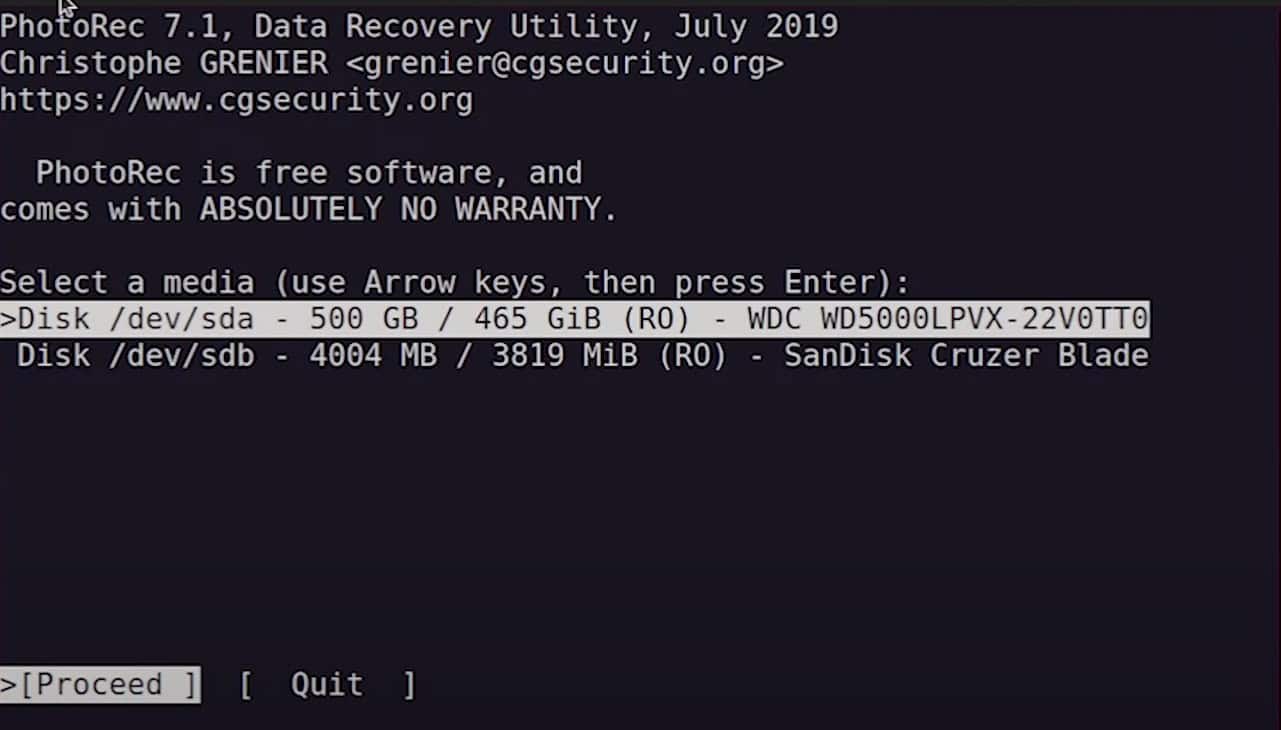
- Use the arrow keys to navigate and select the storage device from which files were lost and press Enter to proceed.
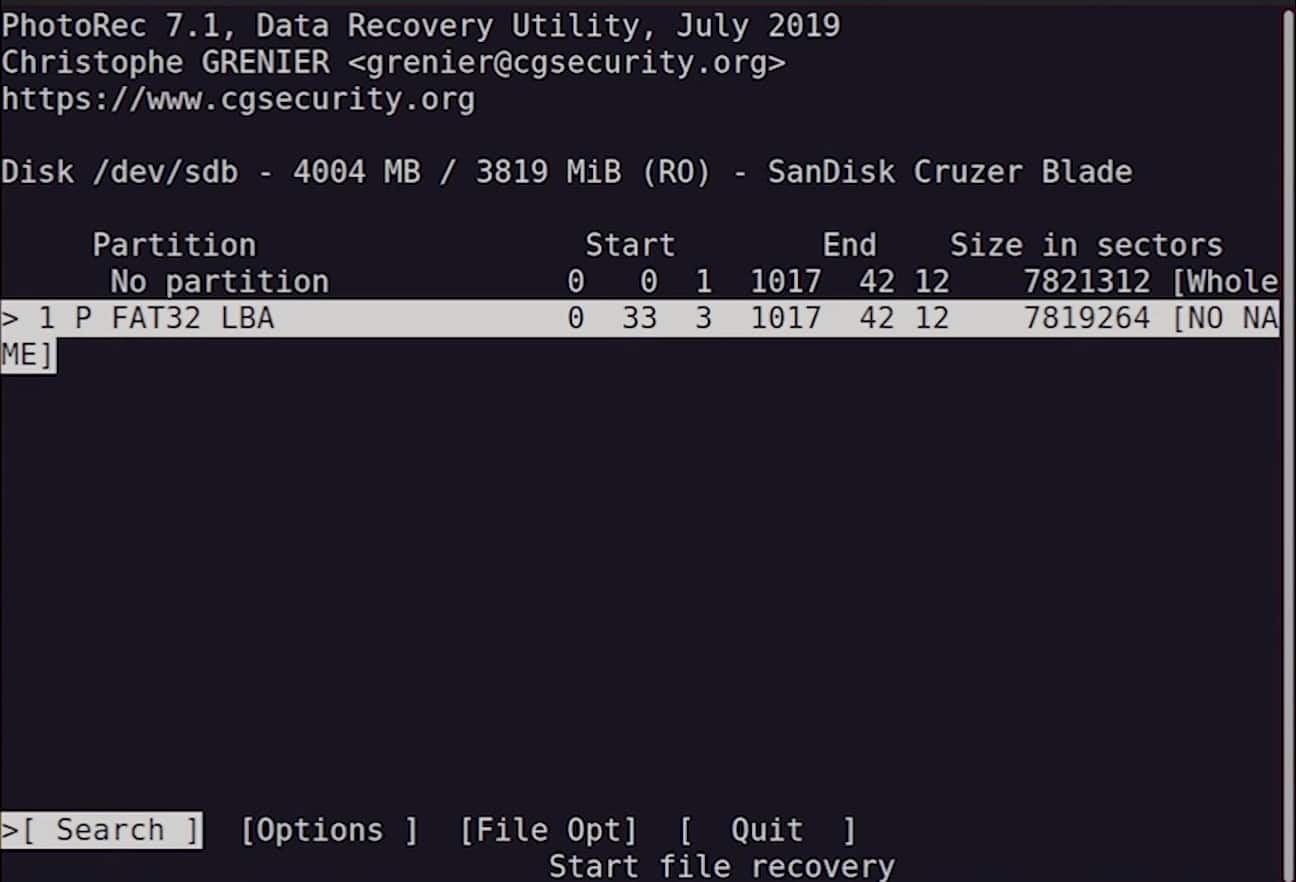
- Select the partition where the files were deleted and press Enter.
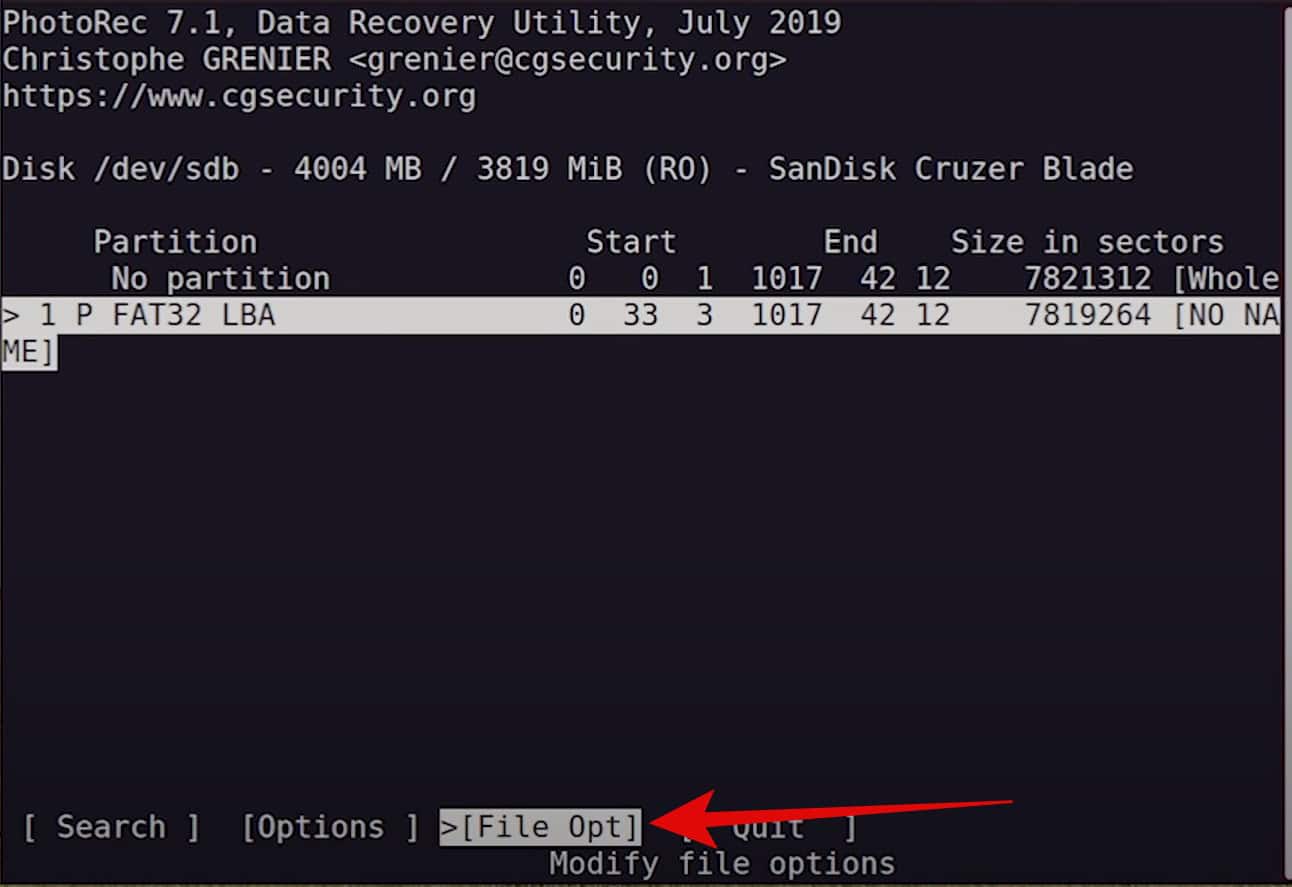
- Navigate to the File Options and press Enter key.
- Select specific file types you want to recover (e.g., JPEG, PDF, DOCX, etc.).
- Press B to save the selection and then go Quit and press Enter.
- Choose a different drive to store the recovered files (do not save them on the same drive).
- Press C to confirm after selecting a destination directory to save.
- Press Enter to begin recovery.
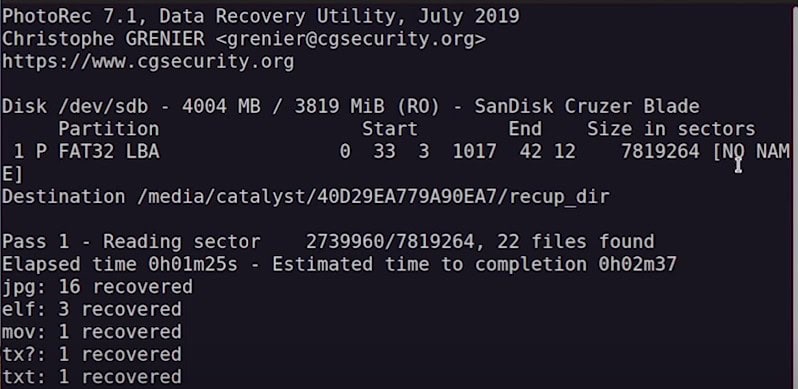
- Wait for the process to complete.
- Once the recovery is done, go to the destination folder you selected and check if your files are restored.
Part 2: Recover Lost Partitions and Files Using TestDisk
How TestDisk works to recover lost partitions in Linux?
When a partition is lost or becomes inaccessible, the problem often lies in the partition table or boot sector, which tells the system how the storage device is organized. TestDisk works by analyzing the drive’s structure, searching for backup partition tables, and identifying existing partitions even if their entries are corrupted or missing. TestDisk can also attempt to repair damaged boot sectors. Once it locates a lost partition, TestDisk allows you to rewrite the partition table, making the partition accessible again. It’s important to note that TestDisk primarily focuses on restoring the structure of the drive; it doesn’t directly recover individual files (though it can list files within a recovered partition to help you verify it’s the correct one).
How to install TestDisk in Linux?
If you are using Debian-based distros such as Ubuntu, open the terminal and run:
sudo apt update -y
sudo apt -y install testdisk
Alternatively, if you’re using RedHat-based distros like CentOS or AlmaLinux, run this command instead:
yum install https://dl.fedoraproject.org/pub/epel/epel-release-latest-8.noarch.rpm
yum update -y
yum install testdisk -y
How to recover deleted partitions step-by-step using TestDisk?
- Once installed, open the TestDisk via the terminal by executing the command:
testdisk- Press Enter to start the program.
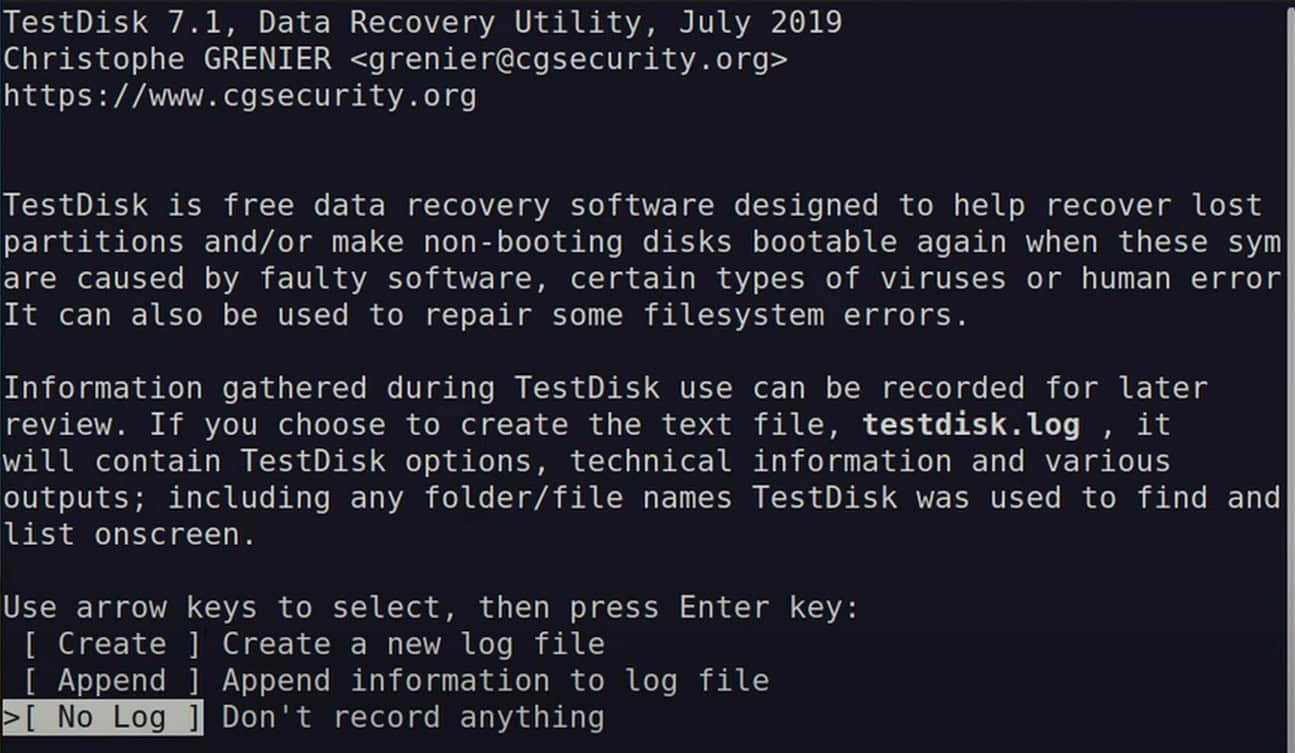
- To create a log, select the default option “Create”; if you don’t need a log, use the arrow keys to choose “No Log” and press Enter to proceed to the next screen.
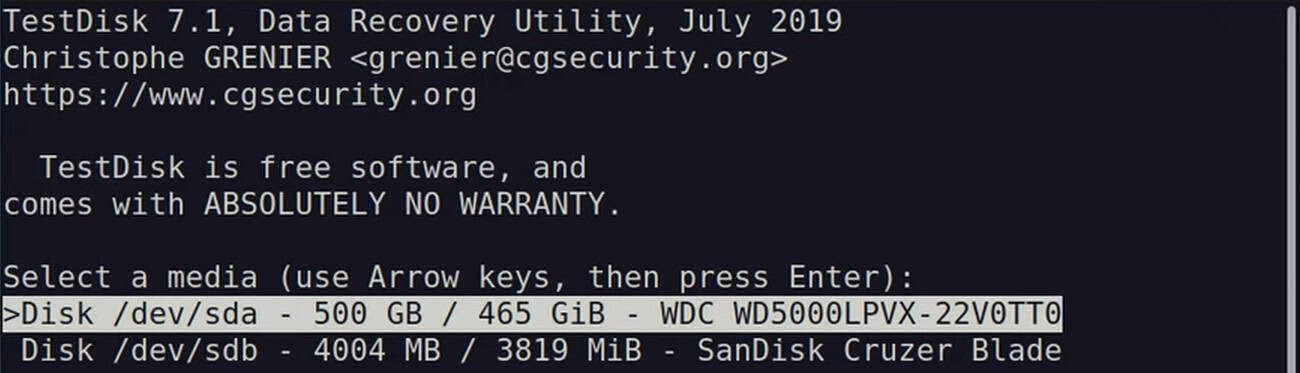
- The data recovery tool TestDisk will now display a list of all connected storage devices. Use the arrow keys to select the device where your partition was deleted and press Enter.
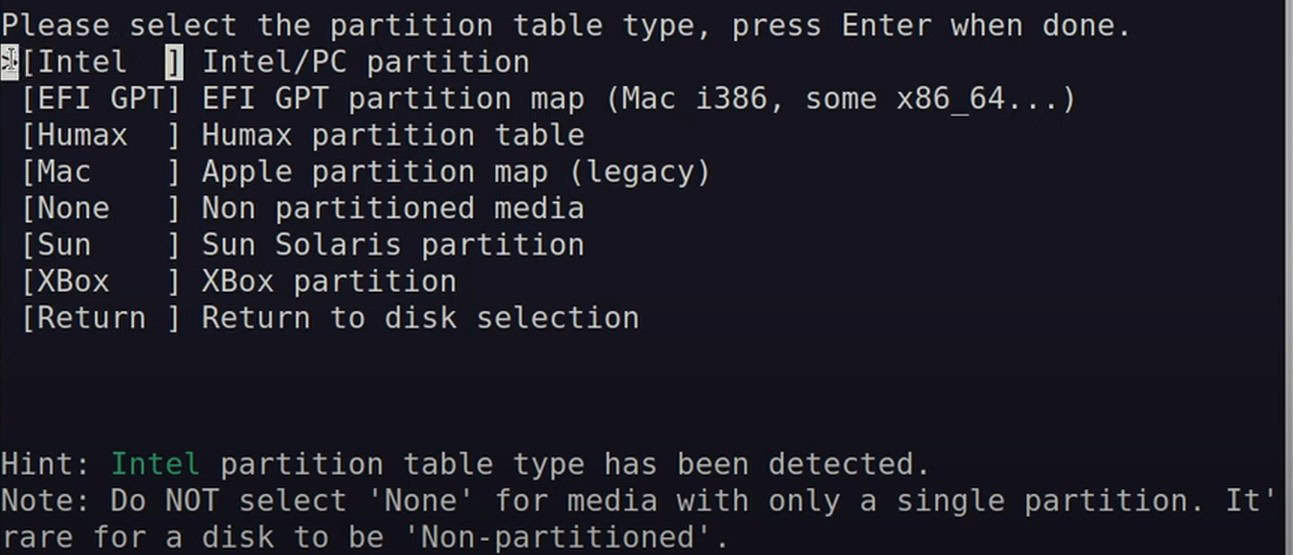
- TestDisk will automatically detect the partition table type (e.g., Intel/MBR or GPT). If the default selection is correct, press Enter.
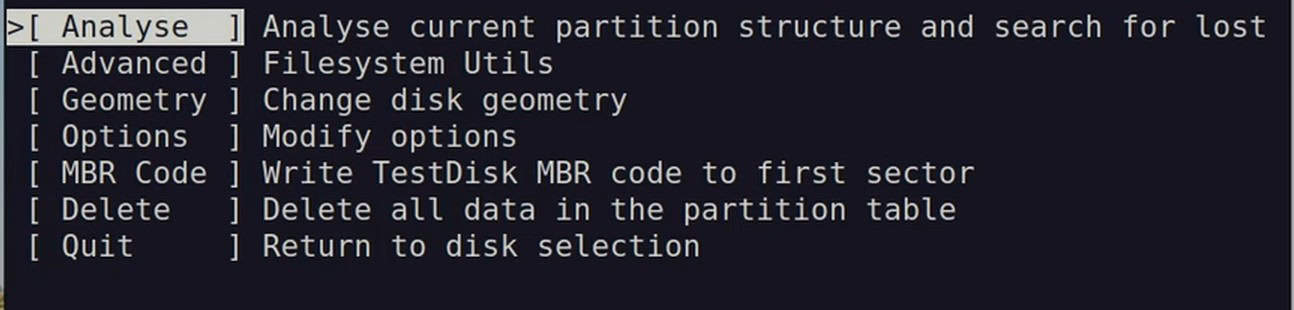
- Navigate to the Analyze option and press Enter to scan the disk for lost partitions.
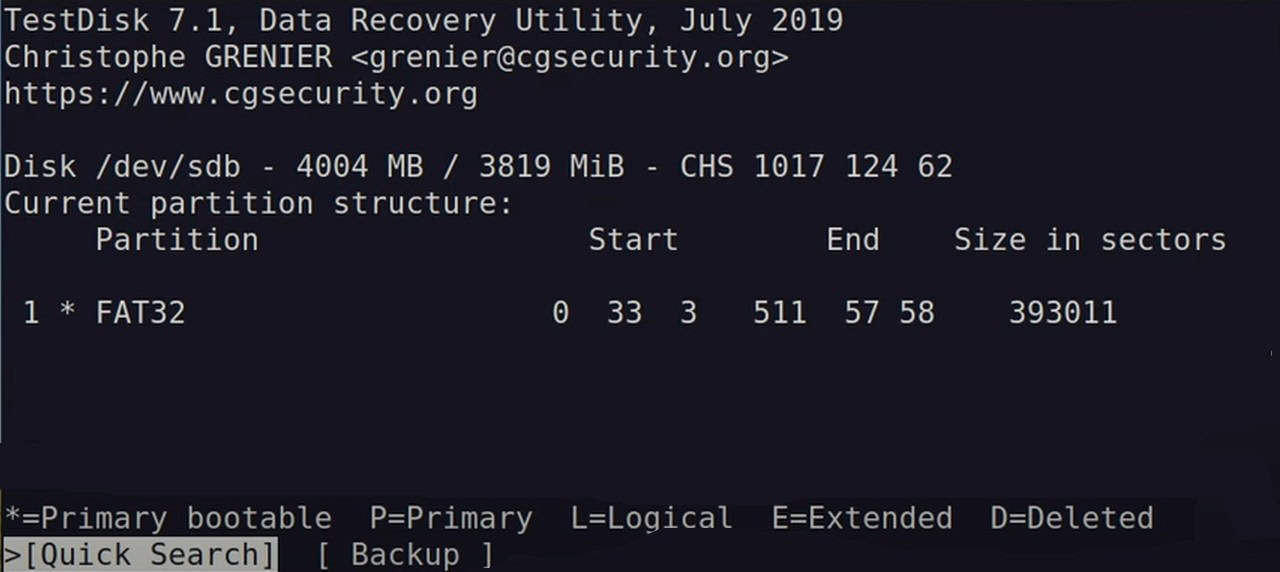
- Select Quick Search to let TestDisk find missing partitions. This process may take some time.
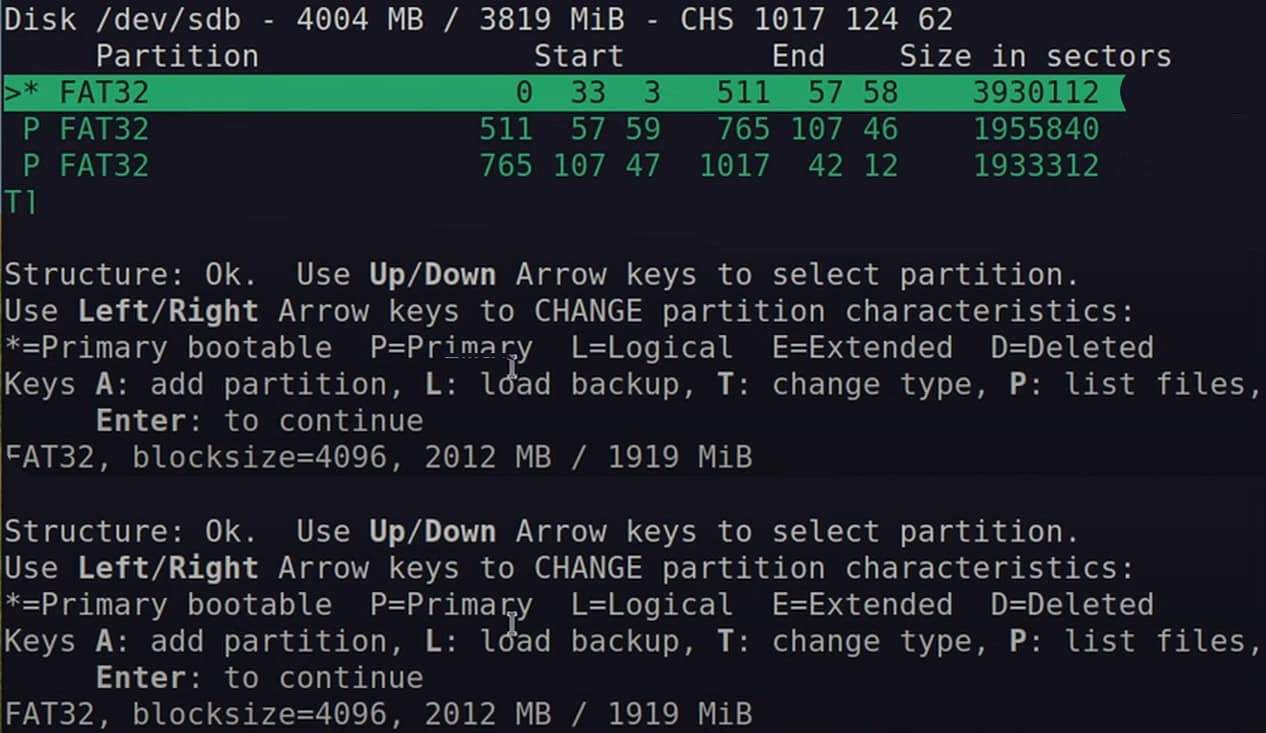
- TestDisk will display the detected partitions. Select the missing partition using the arrow keys and press P to list its files.
- If the files appear correctly, you can proceed with recovery.
- To restore the partition, press Enter and select Write to save changes.
- If you want to recover specific files instead of restoring the whole partition, you can copy them:
- Select the partition.
- Press P to list files.
- Highlight the files you want to recover and press C to copy them.
- Choose a destination folder and confirm.
- After restoring the partition, restart your computer and check if the partition appears in your file manager. If everything looks good, your data is successfully recovered!
PhotoRec and TestDisk effectively recover deleted files Linux as well as lost partitions. Following this guide, you can easily recover lost partitions or deleted files without much doubt if the data was lost sometime before. These tools have limitations; if disk sectors are overwritten, recovering deleted files or partitions becomes impossible. If your data is crucial, a robust backup plan is essential. For those looking to recover deleted files Linux effectively, these tools offer a strong starting point. Consider setting up a Linux VPS backup server using rsync (see our guide: https://www.veeble.com/kb/setup-linux-vps-backup-server-using-rsync/) or exploring an unmetered VPS for ample storage (https://www.veeble.com/in/vps-hosting/) to protect your valuable data from such situations.