Updating PHP versions in Plesk is crucial for security, performance, and compatibility. Newer PHP releases often include security patches, performance optimizations, and features that contribute to a more efficient hosting environment. Staying current ensures that your website is protected against potential vulnerabilities, remains compatible with the latest applications, and takes advantage of the ongoing improvements in PHP development. Regular updates also align with industry standards, support requirements, and the evolving needs of web development.
Plesk allows users to easily manage PHP versions for their websites. This guide will walk you through the process of changing the PHP version in Plesk.
1. Login to Plesk:
Navigate to the Plesk login page. Enter your username and password to log in.
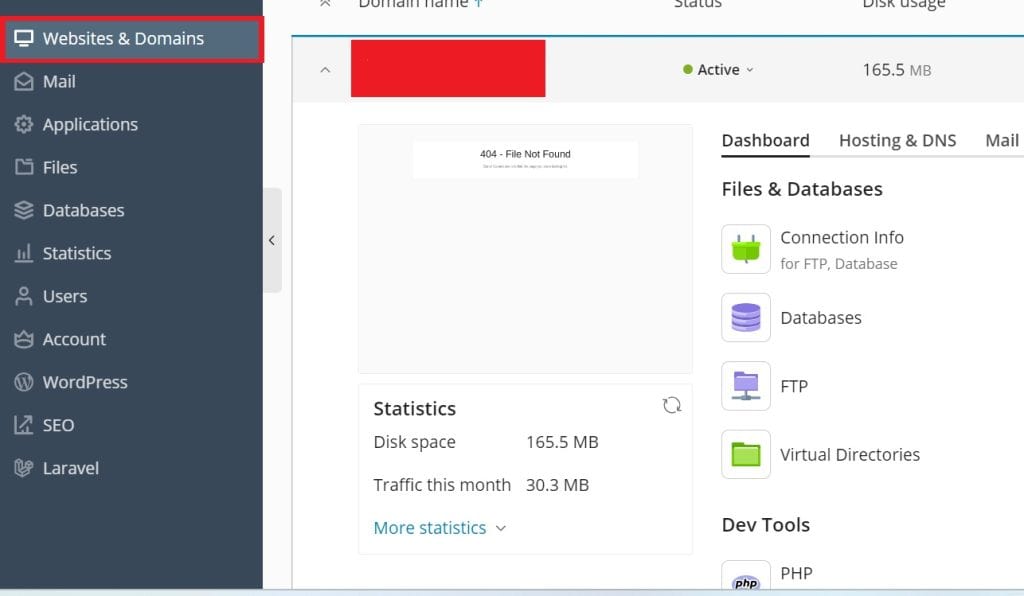
2. Select Websites and Domains

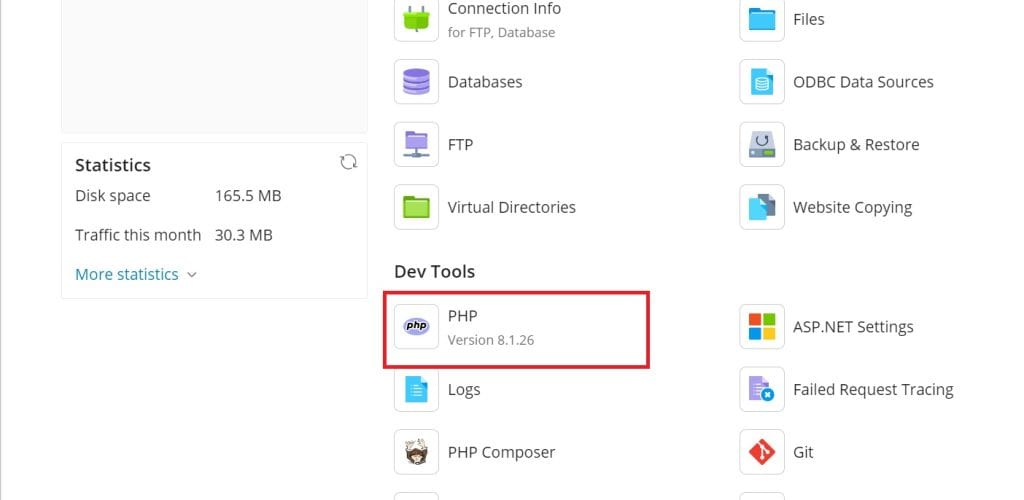
3. Select PHP settings.
Under “Websites & Domains” section, look for the “PHP Settings” option in the control panel.

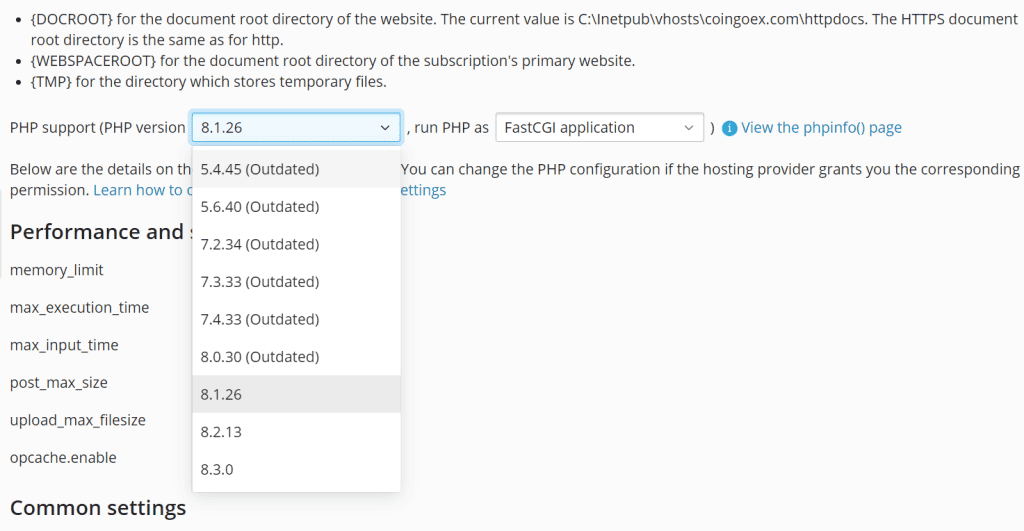
4. Drop down the menu and select the PHP version you want to update for the domain.

5. Scroll down the page and press the “OK” button to save the changes.

After changing the PHP version, it’s essential to test your website to ensure that everything is working as expected. Check for any compatibility issues or errors. Keep in mind that it’s essential to keep your PHP version up to date for security and performance reasons. Check for updates regularly and upgrade to the latest stable version when necessary. Also please note that the specific steps and options may vary slightly depending on the version of Plesk you are using.
