KVM (Kernel-based Virtual Machine) is a powerful open-source virtualization technology built into the Linux kernel. As a server administrator, I can confidently say that KVM is one of the most reliable and efficient virtualization technologies available for Linux users. Built directly into the Linux kernel, KVM allows to run multiple virtual machines with dedicated CPU, RAM, and disk resources – all on a single physical host. As someone who manages both test environments and production setups, I’ve found that mastering the right KVM virtualization commands has not only streamlined my workflow but also given me far greater control over system performance and VM management. Whether you are a sysadmin, developer, or IT enthusiast, diving into KVM is truly worth it.
Understanding and using KVM virtualization commands is essential for anyone managing Linux-based virtual machines. These commands give you full control over your VMs—from creation, configuration, and monitoring to troubleshooting and resource optimization. Whether you are automating deployments or fixing a stuck VM, mastering these KVM Virtualization commands helps ensure stability, performance, and efficiency in your virtual infrastructure.
Top KVM Virtualization Commands
1. Check if KVM is Supported
egrep -c '(vmx|svm)' /proc/cpuinfo-> vmx = Intel, svm = AMD
-> Output > 0 means your system supports KVM.
2. Install KVM & Required Packages
To get started with KVM virtualization, you need to install a set of essential packages including qemu-kvm, libvirt, and related tools. These packages enable VM creation, management, and networking support on your Linux system.
apt install qemu-kvm libvirt-daemon-system libvirt-clients bridge-utils virt-manager
3. Start and Enable libvirtd
The libvirtd service is responsible for managing virtualization processes and must be running for KVM to function properly. Use the following commands to start the service immediately and enable it to launch automatically at boot.
sudo systemctl start libvirtd
sudo systemctl enable libvirtd
4. List All Virtual Machines
To view all virtual machines managed by KVM, including those that are currently shut down, you can use the virsh command-line tool. This KVM Virtualization commands helps you quickly check the status, names, and IDs of your VMs in one place.
virsh list --all
5. Start a VM
To power on a virtual machine, use the virsh start command followed by the VM’s name. This command boots the VM and gets it running with its assigned resources.
virsh start vm-name
6.Stop a VM
To safely shut down a running virtual machine, use the virsh shutdown command followed by the VM name. This sends an ACPI 1 shutdown signal, allowing the VM to power off gracefully.
Even if you’re using control panels like SolusVM, Virtualizor, Proxmox VE, or WebVirtCloud, there are situations where shutting down the VM directly from the backend using virsh is necessary. For example, if the control panel becomes unresponsive or the VM doesn’t respond to soft shutdowns, backend access ensures you can still manage the VM safely and effectively.
virsh stop vm-name
7. Destroy a VM
The virsh destroy command is used to forcefully power off a virtual machine without giving it time to shut down gracefully. It’s equivalent to unplugging the power cable and should only be used when the VM is unresponsive or a clean shutdown fails.
virsh destroy vm-name
8. Get VM Info
To view detailed information about a specific virtual machine, use the virsh dominfo command followed by the VM name. This provides key data such as the VM’s state, CPU allocation, memory usage, and uptime.
virsh dominfo vm-namevirsh dominfo d9092f1e-98764-428b-8a99-51c61f7897c
Id: 127
Name: d9092f1e-98764-428b-8a99-51c61f7897c
UUID: d9092f1e-98764-428b-8a99-51c61f7897c
OS Type: hvm
State: running
CPU(s): 2
CPU time: 4729.9s
Max memory: 2097152 KiB
Used memory: 2097152 KiB
Persistent: yes
Autostart: enable
Managed save: no
Security model: none
Security DOI: 09. Restart a Virtual Machine
To restart a virtual machine without shutting it down manually, use the virsh reboot command followed by the VM name or UUID. This sends an ACPI reboot signal to the guest OS, similar to pressing the reset button on a physical server.
virsh restart vm-name10. Edit VM Configuration File
You can modify a VM’s hardware or boot settings by editing its XML configuration using the virsh edit command. This opens the VM’s configuration in your default text editor, allowing changes to CPU, memory, network interfaces, disks, and more — just be sure to save and exit carefully to apply the changes.
virsh edit vm-name11. Check VM Disk Devices
Sometimes, especially when troubleshooting disk issues or managing VM storage, it’s essential to view the block devices attached to a VM. You can use the following command.
virsh domblklist vm-namevirsh domblklist d9092f1e-98764-428b-8a99-51c61f7897c
Target Source
------------------------------------------------
sda /dev/vps/6095_0
sdz /usr/local/abc/iso_images/6095/config.iso12. Access VM Console
To access a virtual machine’s console directly from the terminal, use the virsh console command followed by the VM name. This is especially useful for VMs without a graphical interface or when network access is unavailable
virsh console vm-name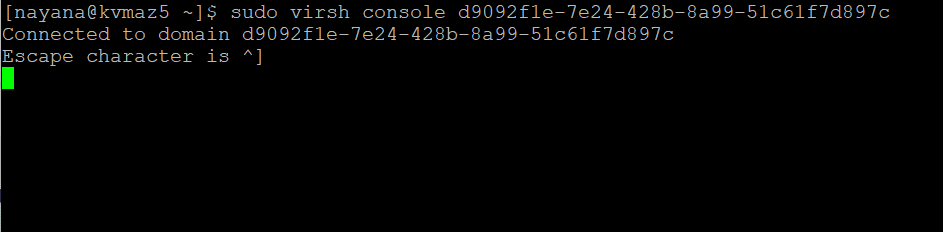
Conclusion
Mastering KVM Virtualization commands can significantly boost your server management capabilities. With the above KVM Virtualization Commands, you are well equipped to create, manage, and destroy your virtual machines efficiently. Whether you are running test environments or deploying production servers, KVM is a robust choice for Linux virtualization.
Looking for reliable and high-performance KVM VPS hosting? Check out Veeble’s KVM VPS solutions — featuring SSD storage, full root access, and blazing-fast performance. Perfect for developers, businesses, and tech enthusiasts who need power and flexibility in a virtual environment.