Samba is an open-source software package that enables a server based on Unix or Linux to work with clients across Windows and others. It brings the SMB/CIFS protocol1 implemented so it acts as a Linux file server, or domain controller.
In this guide, we will guide you to install and configure Samba on Ubuntu 224.04. Its versatility allows Linux systems to act as file servers, domain controllers, or even provide basic file-sharing functionality, making it indispensable in mixed OS environments.
Why Use Samba?
Samba is very important in creating a seamless file-sharing environment, especially in mixed-OS networks. It’s versatile, secure, and supports various features such as sharing files, printers, and authentication services.
1. Install Samba
1. Update your system
Update your system before installing Samba. Run below command to update your system.
apt update && sudo apt upgrade -y2. Install Samba
To install Samba, use the following command.
apt install samba -y3. Verify Installation
Check if Samba is installed by verifying the installed version.
samba --version
2. Configure Samba
Samba’s configuration file is located in /etc/samba/smb.conf. You can customize it by editing this file.
1. Edit configuration file
Edit Samba configuration file and add the lines given in next step.
vi /etc/samba/smb.conf2. Setup shared directory
Add the following section at the end of the file and save your configuration file.
[SharedFolder]
path = /path/to/shared/folder
browseable = yes
writable = yes
guest ok = no
read only = no
Replace /path/to/shared/folder with the folder path you want to share.
Note: If you have made any changes to the configuration file, you have to restart Samba service.
3. Create a Shared directory
If the given folder in the configuration file doesn’t exist, you have to create it and want to apply proper permissions.
 mkdir -p /path/to/shared/folder
 chmod -R 775 /path/to/shared/folder
3. Start and Enable Samba service
1. Restart Samba
Once the changes are made, restart samba using the following command.
Systemctl restart smbd2. Enable Samba to start on Reboot
Run the following command.
systemctl enable smbd3. Check Samba Status
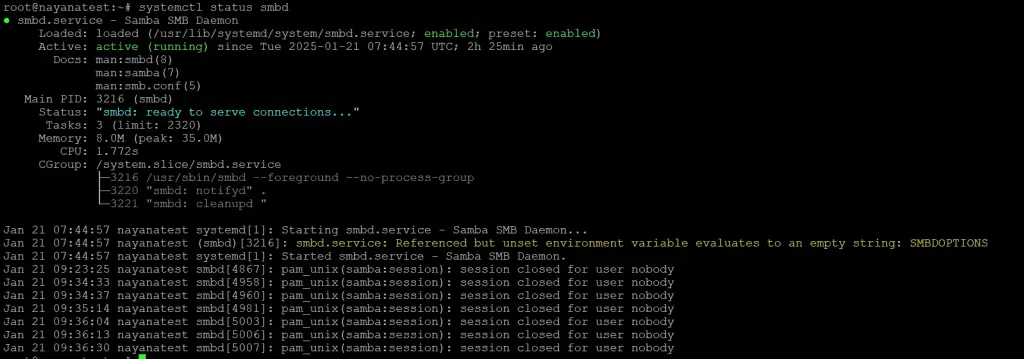
Ensure Samba is Running.
systemctl status smbd
4. Access the Samba
From Windows
-> Go to the This PC and right click on the empty space. From the drop down list, select Add a network location.
-> From the following dialogue box, click next.

-> Next you will prompt to Choose a custom network location. In this prompt box specify the IP and name of directory and click next.

Now you have successfully created the network location and then click on the Finish . Now your folder has been successfully shared with Windows.
From Linux
Use the following command to access the share from linux.
smbclient //server-ip-address/SharedFolderTroubleshooting Samba
Check configuration Syntax
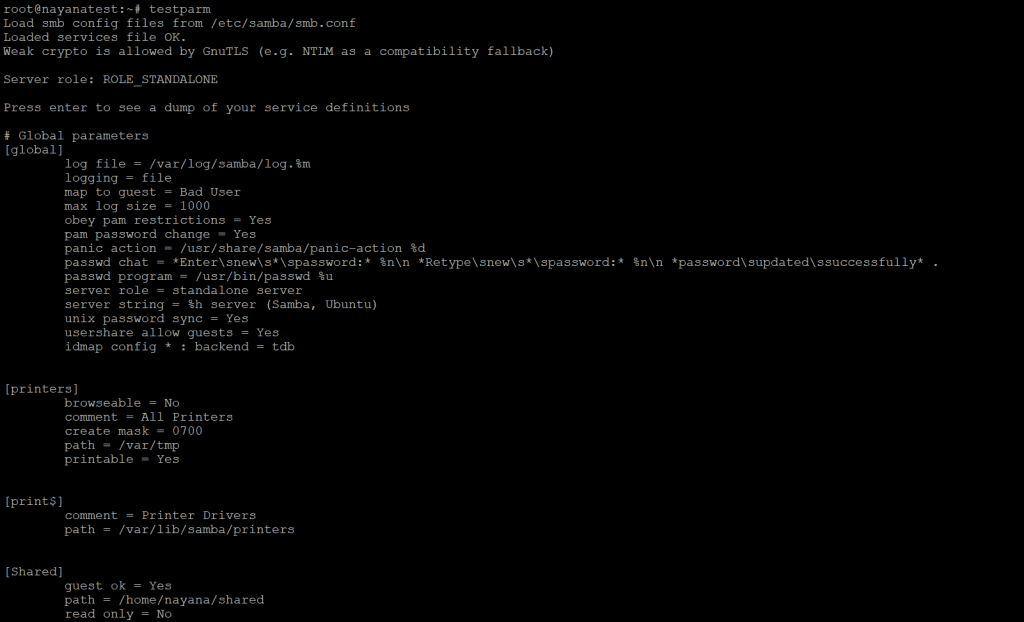
If Samba doesn’t run, check for any errors in your configurations.
testparm
Check Logs
Review Samba logs for detailed error messages:
tail -f /var/log/samba/smbd.logConclusion
Samba is a powerful tool for creating cross-platform file sharing in mixed networks. By following this guide, you can set up and manage a secure Samba server on Ubuntu 24.04. With its flexibility and rich feature set, Samba makes collaboration easy and efficient. If you run into issues, don’t forget to check the logs and configuration for clues.
Also Read:
