WordPress themes control the visual presentation of your website. Installing a new theme can refresh the look and feel of your site. Here’s a step-by-step guide on how to install a new theme.
1. Choose a WordPress Theme
- Login to Your WordPress Dashboard:
Access your WordPress admin area by visiting http://yourdomain.com/wp-admin.
2. Navigate to “Appearance” > “Themes”:
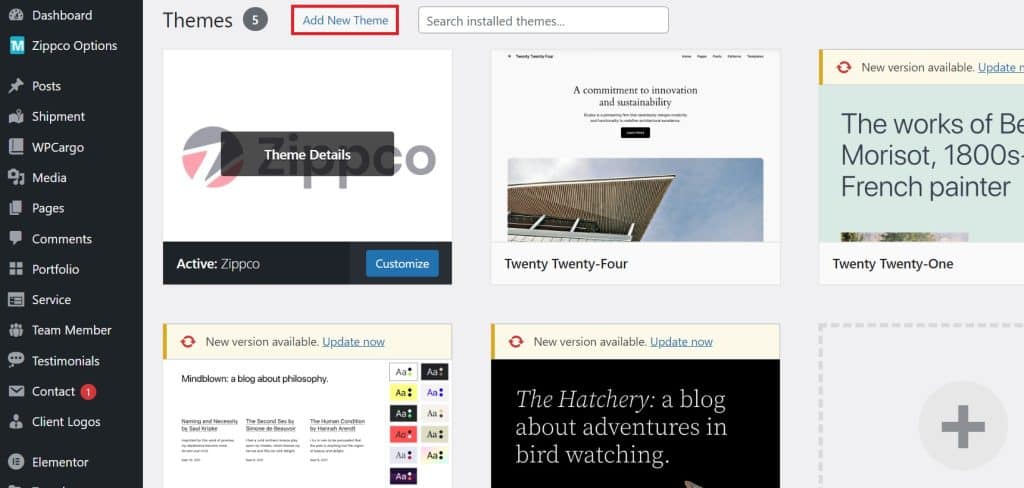
In the WordPress dashboard, go to “Appearance” and select “Themes.

3. Click on “Add New”:
Click the “Add New” button to browse and search for themes directly from the WordPress repository.

2: Install the Theme
- Search or Upload a Theme:
Use the search bar to find a theme or click “Upload Theme” to install a theme from a ZIP file.
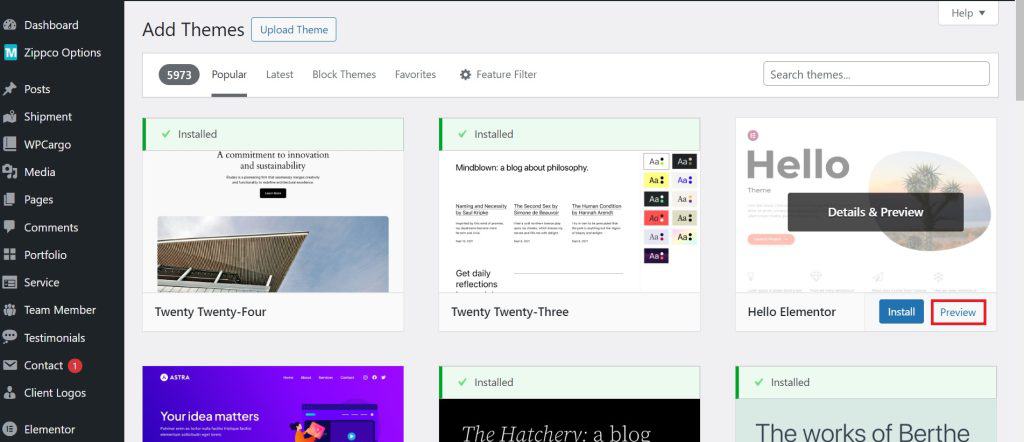
5. Preview the Theme:
Before installation, you can preview how the theme will look on your site.

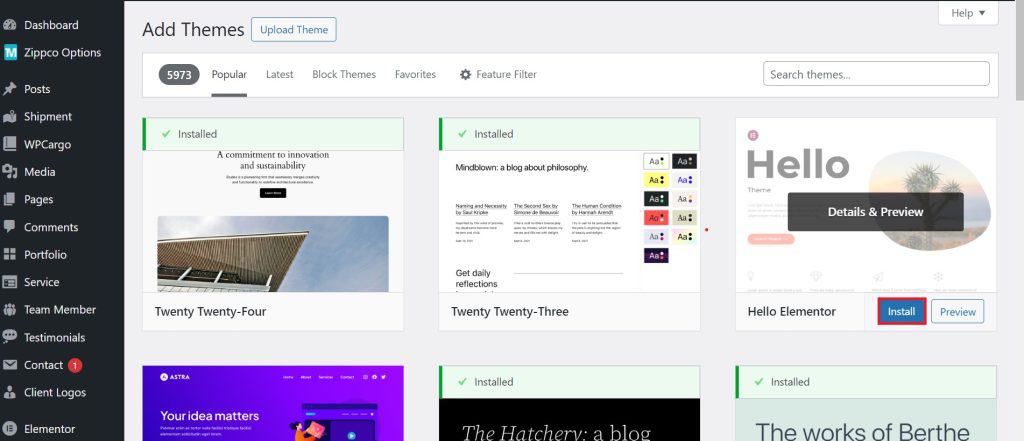
6. Click “Install”:
Once you’ve found the desired theme, click the “Install” button.

3: Activate the Theme
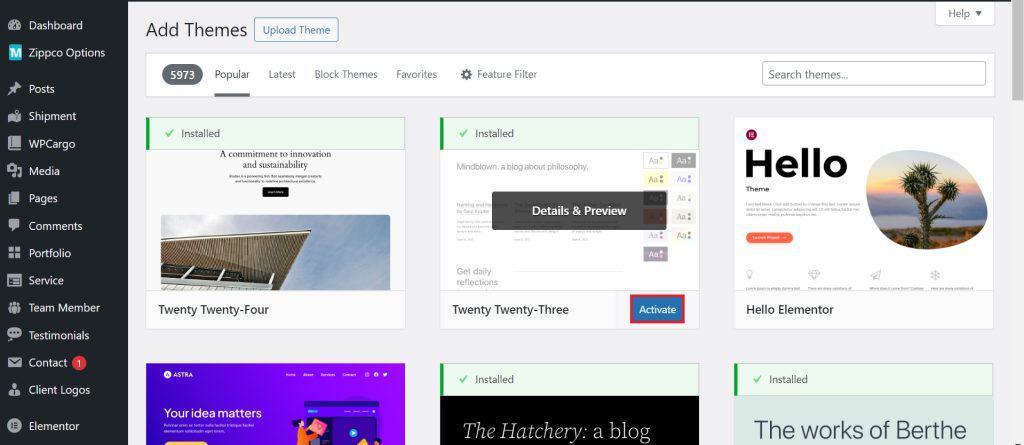
- Activate the Installed Theme:
After the theme is installed, click the “Activate” button to make it the active theme for your site.

8. Customize Your Theme (Optional):
Navigate to “Appearance” > “Customize” to customize the theme settings. Depending on the theme, you can modify colors, fonts, layouts, and more.

Installing a new theme is a simple process that allows you to change the visual appearance of your site quickly. Keep in mind that changing themes may affect your site’s layout, so it’s advisable to preview and customize the theme to match your preferences.
