Remote Desktop Protocol (RDP) allows users to connect to a Windows server remotely, making it an essential tool for system administrators and remote workers. However, since RDP uses the default port 3389, it is frequently targeted by hackers attempting brute-force attacks and unauthorized access. Change the default RDP port in Windows, which enhances security by reducing the risk of automated attacks and making your system less visible to cyber threats.
By modifying the RDP port, you add an extra layer of protection against malicious bots and attackers scanning for open ports. Change the default RDP port to make your system less vulnerable to brute-force attacks and unauthorized access. This simple yet effective security measure helps protect sensitive data and prevent unauthorized login attempts. In this guide, I will walk you through the step by step process of changing the RDP port in Windows, configuring firewall settings, and ensuring a secure remote connection.
Prerequisites
- Administrator access to the Windows server .
- Firewall access to allow the new RDP port.
- Backup of the Windows Registry before making changes.
Steps to Change the Default RDP Port in Windows
1. Open the Windows Registry Editor
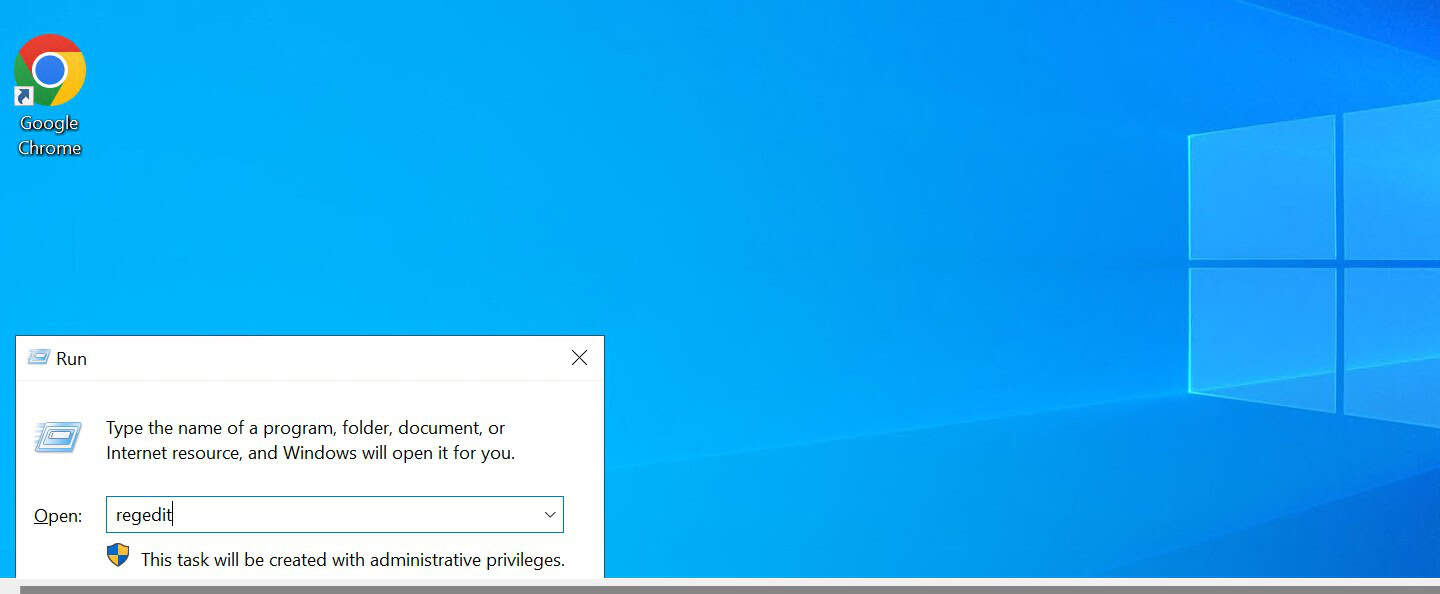
- Press Win + R on your keyboard to open the Run dialog box.
2. Type regedit and press Enter. This will launch the Registry Editor.
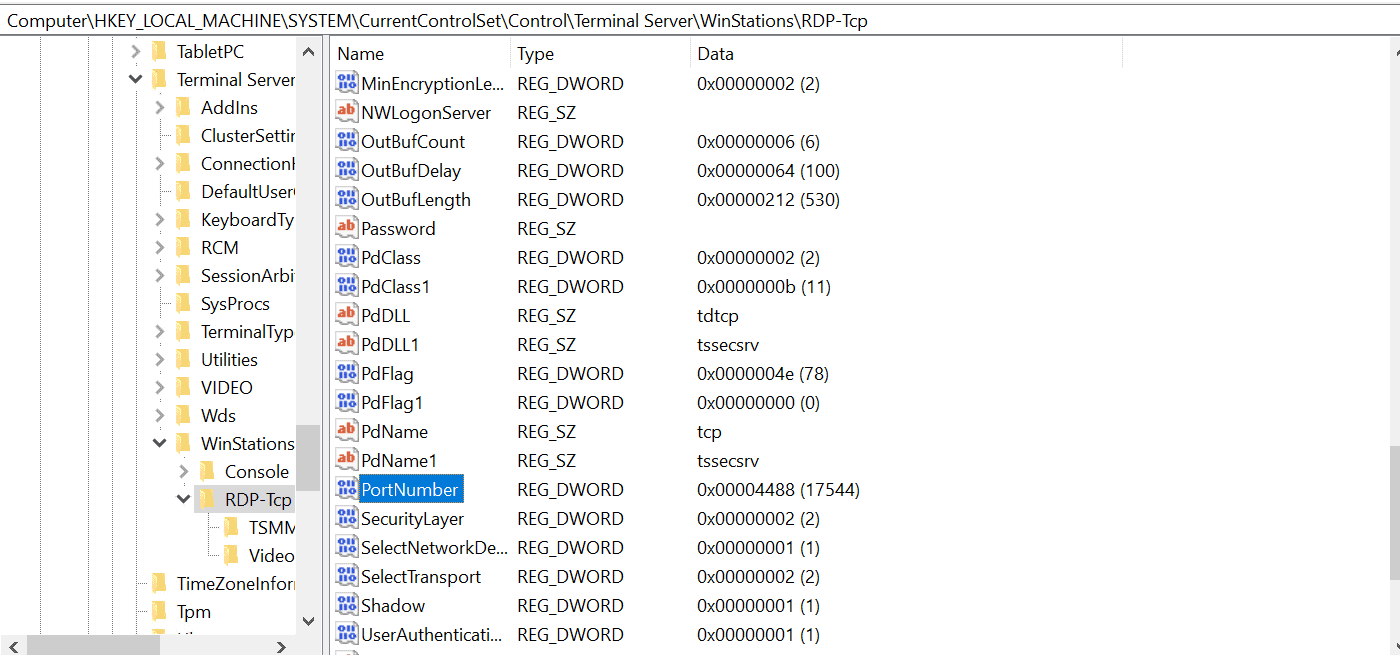
3. In the Registry Editor, navigate to :
HKEY_LOCAL_MACHINE\System\CurrentControlSet\Control\TerminalServer\WinStations\RDP-Tcp
Look for the entry named PortNumber in the right-hand pane.
2. Modify the RDP Port
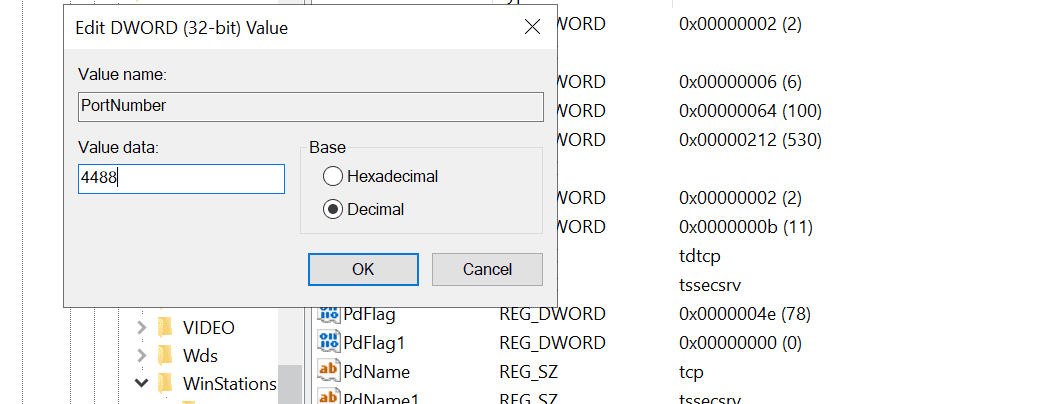
- Double-click on PortNumber to edit its value.
- In the Edit DWORD (32-bit) Value window, select Decimal under Base.
- To change the default RDP port, change the value from 3389 to a new port number of your choice (e.g., 4488 or any number between 1024 and 65535).
- Click OK to save the changes.
- Close the Registry Editor.
3. Configure Windows Firewall to Allow the New RDP Port
Since we changed the RDP port, we need to allow it through Windows Defender Firewall.
- Open Control Panel and go to Windows Defender Firewall.
- Click on Advanced settings on the left sidebar.
- In the Windows Defender Firewall with Advanced Security window, click Inbound Rules.
- Click on New Rule in the right-hand panel.
- Select Port and click Next.
- Choose TCP and enter your new RDP port (e.g., 4488) in the Specific local ports field.
- Click Next, select Allow the connection, and click Next again.
- Ensure all profiles (Domain, Private, Public) are checked and click Next.
- Name the rule (e.g., “New RDP Port Rule”) and click Finish.
4. Restart the RDP Service
- For the changes to take effect, restart the Remote Desktop Service:
2. Open Command Prompt as Administrator (search cmd, right-click, and select Run as administrator).
3. Run the following command to stop and restart the RDP service.
net stop termservice && net start termservice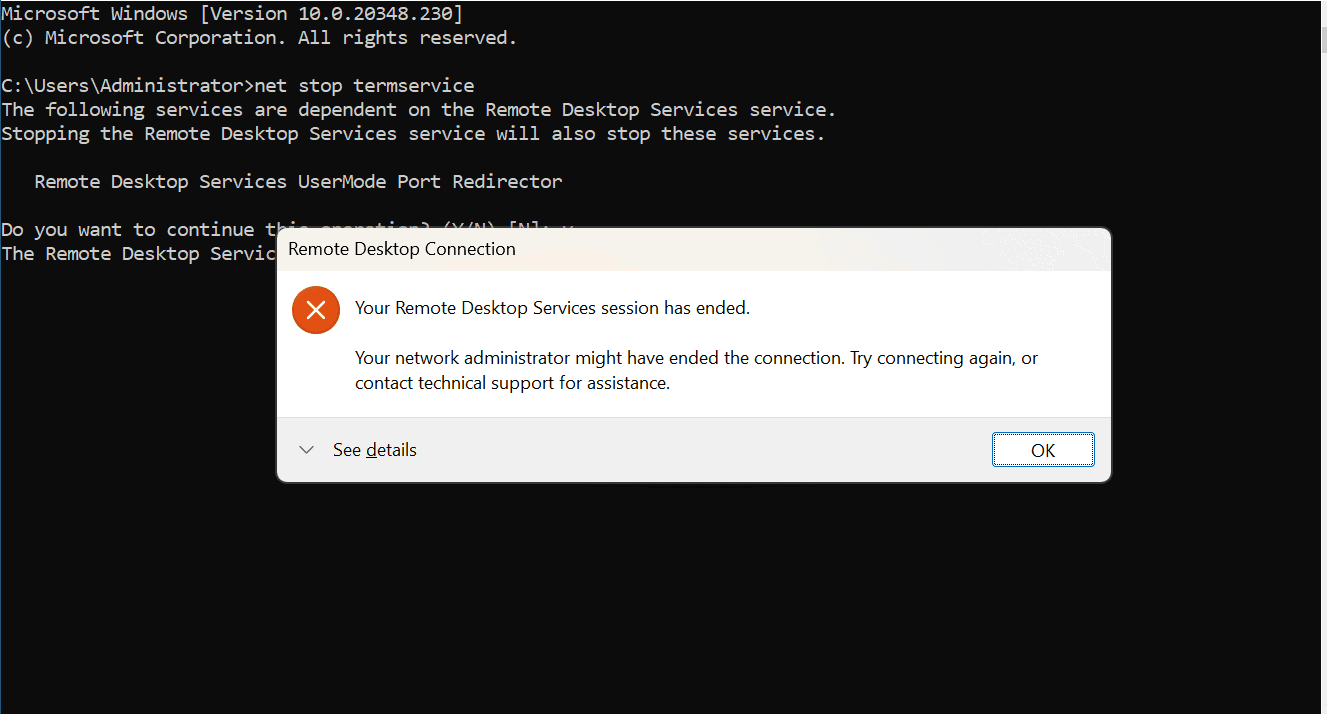
Alternatively, you can restart your computer for the changes to take effect.
5. Connect Using the New RDP Port
1. After changing the port, you must specify the new port when connecting via Remote Desktop:
2. Open Remote Desktop Connection .
3. In the Computer field, enter your server’s IP or hostname followed by a colon and the new port number.
IP:4488
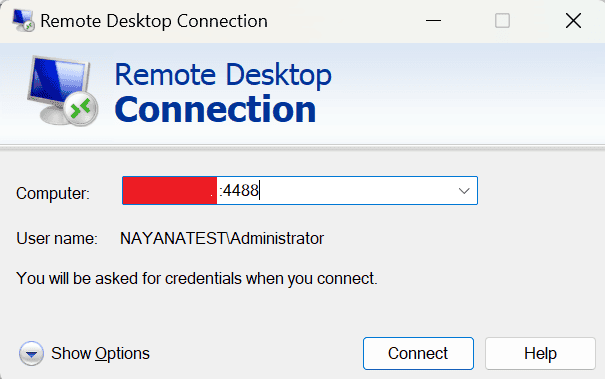
4. Click Connect and enter your credentials to log in.
Conclusion
Change the default RDP port also enhances security by reducing exposure to brute-force attacks and unauthorized login attempts. By using a non-standard port above 1024 but below 65535, you make it more difficult for attackers to scan and exploit your remote desktop connection. However, simply changing the port is not enough. It’s crucial to update your Windows Firewall rules also.
At Veeble, we offer secure and high performance Windows RDP solutions designed for seamless remote access with enhanced security features. Whether you’re a business professional, developer, or trader, our Veeble Windows RDP services provide optimized performance, dedicated resources, and advanced security configurations to keep your connections safe.
By implementing these security measure, you can significantly improve the protection of your Windows server against cyber threats, ensuring reliable and secure remote access.