When it comes to the database and user management with Webmin, it can be a little confusing or sometimes we could not find the actual steps to follow. In this article, we will learn how to Manage MySQL users with the Webmin control panel installed on our server. The method is very easy.


You can follow the steps mentioned below to start managing your MySQL.
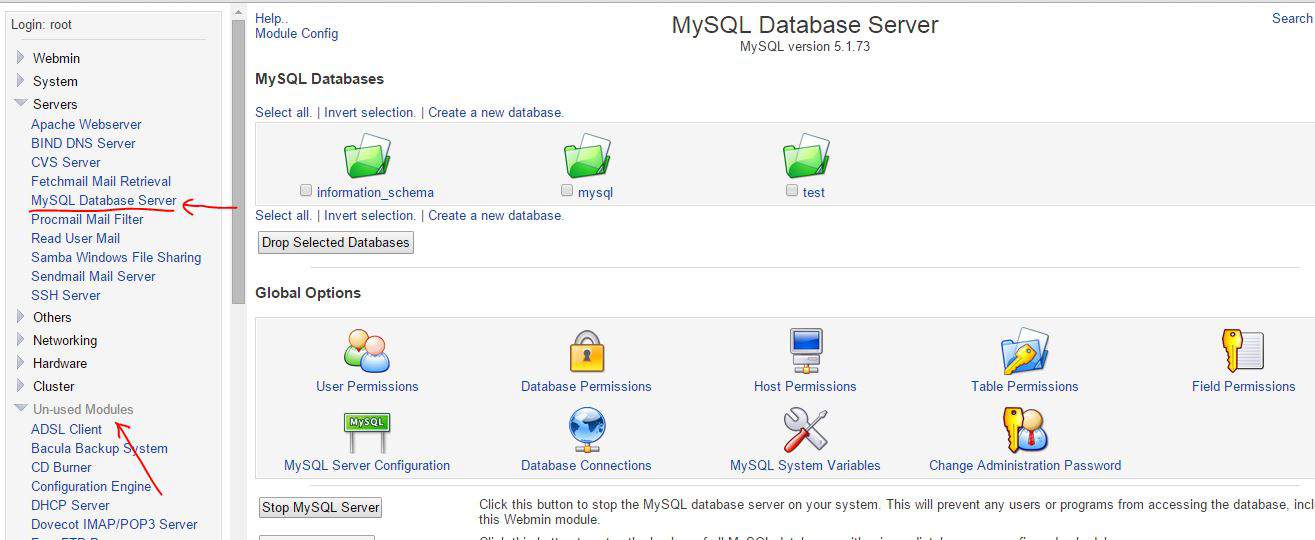
1. Login to webmin and find the section called “Servers”
2. Click “MySQL Database Server” (If not found, please check in ‘un-used‘ modules and click on MySQL Database Server)
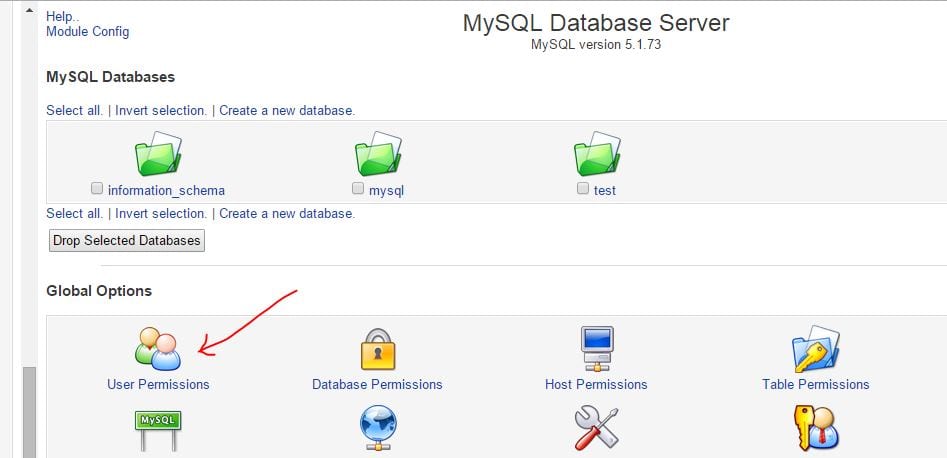
3. Select “User Permissions”
To create a new user:
1. Click “Create new user” under the table listing current users
2. Enter a username and password
3. Select permissions (these are global privileges – you can set privileges for individual databases in another section)
4. Click “Create”
To change permissions for specific databases, follow these steps:
1. From the MySQL Database Server page, click “Database Permissions”
2. Click the name of the database you want to manage
3. For “Username” toggle the box to the right of the anonymous box and enter the user you want to have permissions for this database
4. Select the permissions you want to grant. To select multiple permissions, hold the Control key and click them
Click “Save”
Webmin is a free web hosting control panel and you can use it with any Linux server. Thank you for reading!
