
Transferring your email accounts from Plesk to cPanel might initially appear challenging, yet with a well-defined process, it becomes straightforward. Here’s a method we’ve rigorously tested for migrating a client’s email accounts from Plesk to cPanel, incorporating steps for utilizing email client software such as Thunderbird for the direct transfer of emails. This approach has proven successful, and we’re excited to share it with you. Let’s explore the steps!
Backup Email Accounts:
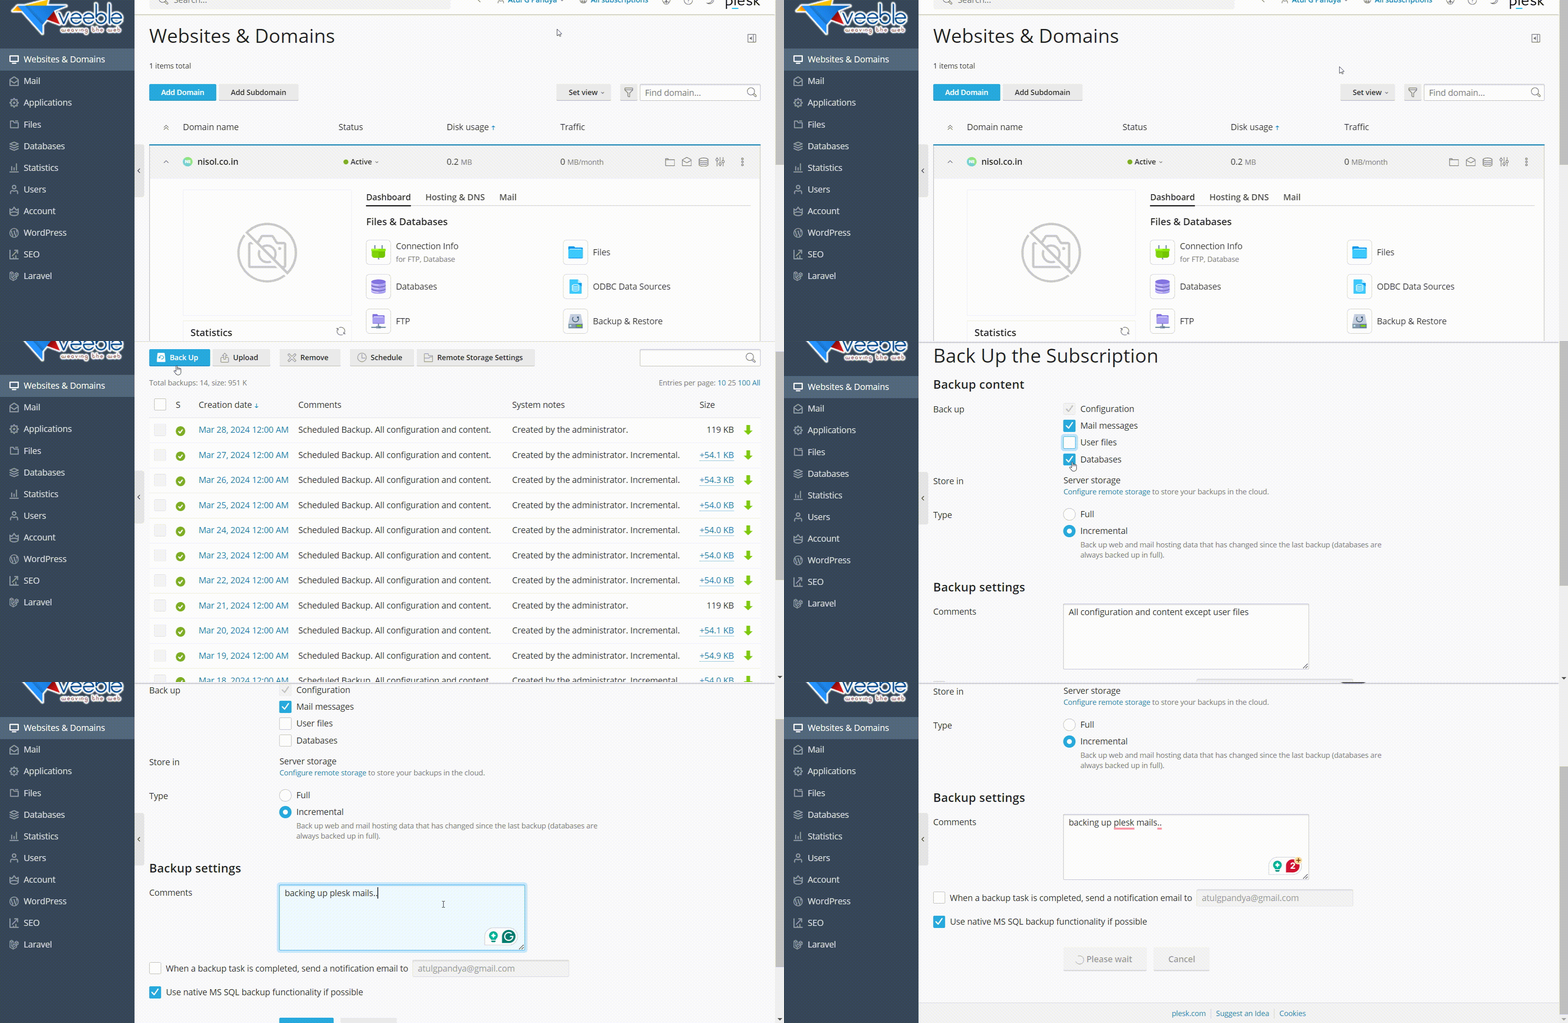
As always before doing any steps related to migration, make sure to backup those email accounts for a safety net. Here’s how you can back up email accounts in Plesk:
- Navigate to Websites & Domains in Plesk, select your domain, and click on Backup Manager.
- Press Back Up and ensure you include mail content in your selection.
- Choose where to store the backup (server or external storage) and start the backup by clicking OK.
- Download the backup for safekeeping, if desired.
Setting Up cPanel:
After taking backups and diving into the migration process, there’s an important step we can’t skip: setting up your email accounts in the new control panel, cPanel. It’s like making sure each of your emails has a matching mailbox waiting on the other side. To keep things smooth, use the same usernames and passwords from Plesk. If there’s a hitch and you don’t remember some passwords, no worries—just set new ones. Then, make sure to go back to Plesk and update those accounts so everything matches up perfectly. This way, we lay the groundwork for a smooth transition.
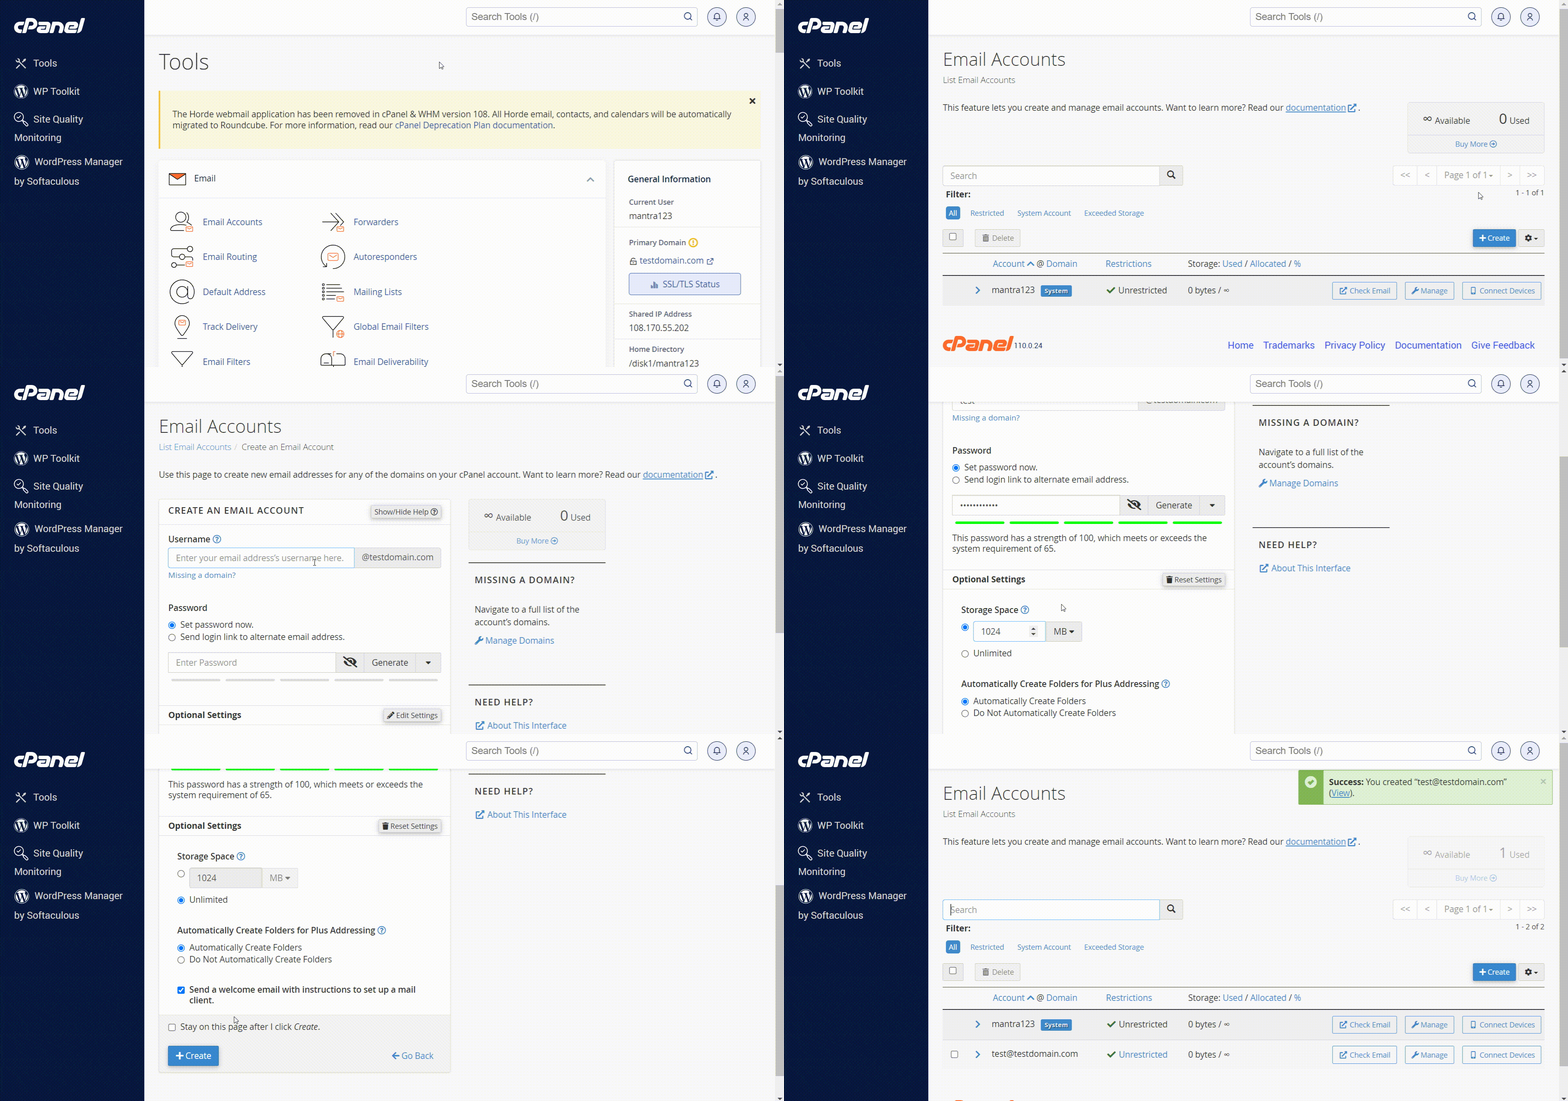
To create email accounts in cPanel with the same IDs and passwords as in Plesk:
- Access your cPanel control panel and scroll down or use the search bar to find the “Email Accounts” section.
- Click on “Email Accounts” and then click on “Create” to create an email account.
Email: Enter the exact email address you had in Plesk.
Password: Use the same password as the source email account.
Storage Space: Specify the mailbox quota if you want to limit the storage for this email account.
- Click on “+ Create“
Repeat these steps for each email account you need to transfer from Plesk to cPanel, ensuring to use the exact email IDs and passwords.
Ensure that the DNS settings remain as they are, still directing to the Plesk server (MX records pointed to Plesk server DNS) while you're carrying out these steps. It's only after you've successfully moved the data that you should update the MX records at your domain registrar to point towards the new cPanel server.
Logging Accounts in Mail Client:
This part is like using a moving truck to get your stuff from the old house to the new one, but for emails. Using a mail client, you can easily migrate your email account data from Plesk to cPanel by dragging and dropping.
For this tutorial, we utilize Mozilla Thunderbird as it is free and accessible on various platforms. However, if you prefer to use a different email client, like Outlook, you can still perform the same action, but the interface may differ, so the steps may slightly vary. Regardless, Outlook is also capable of performing the same function.
Tutorial for installing Thunderbird in Windows: https://support.mozilla.org/en-US/kb/installing-thunderbird-windows
Tutorial for installing Thunderbird in Linux: https://support.mozilla.org/en-US/kb/installing-thunderbird-linux
Steps to configure mail client:
Open Mozilla Thunderbird on your local PC and add both your Plesk and cPanel email accounts using IMAP. This way, you have both your old (source email account) and new (destination email account) email accounts accessible in one place.
Steps:
- Launch Mozilla Thunderbird on your computer.
- If this is your first time using Thunderbird, you’ll automatically be prompted to set up a new account.
If you’re adding another account to Thunderbird, click on the menu button (three horizontal lines) in the upper right corner, select Account Settings, and then click Account Actions at the bottom left corner. Choose Add Mail Account. - In the setup window, enter your name, email address, and password, and then click “Manual Config“
- Choose protocol as IMAP, and hostname as your cPanel server IP address. These settings will be the same for both incoming and outgoing server configurations.
- Click “Advanced config” and click “OK” on the next prompt.
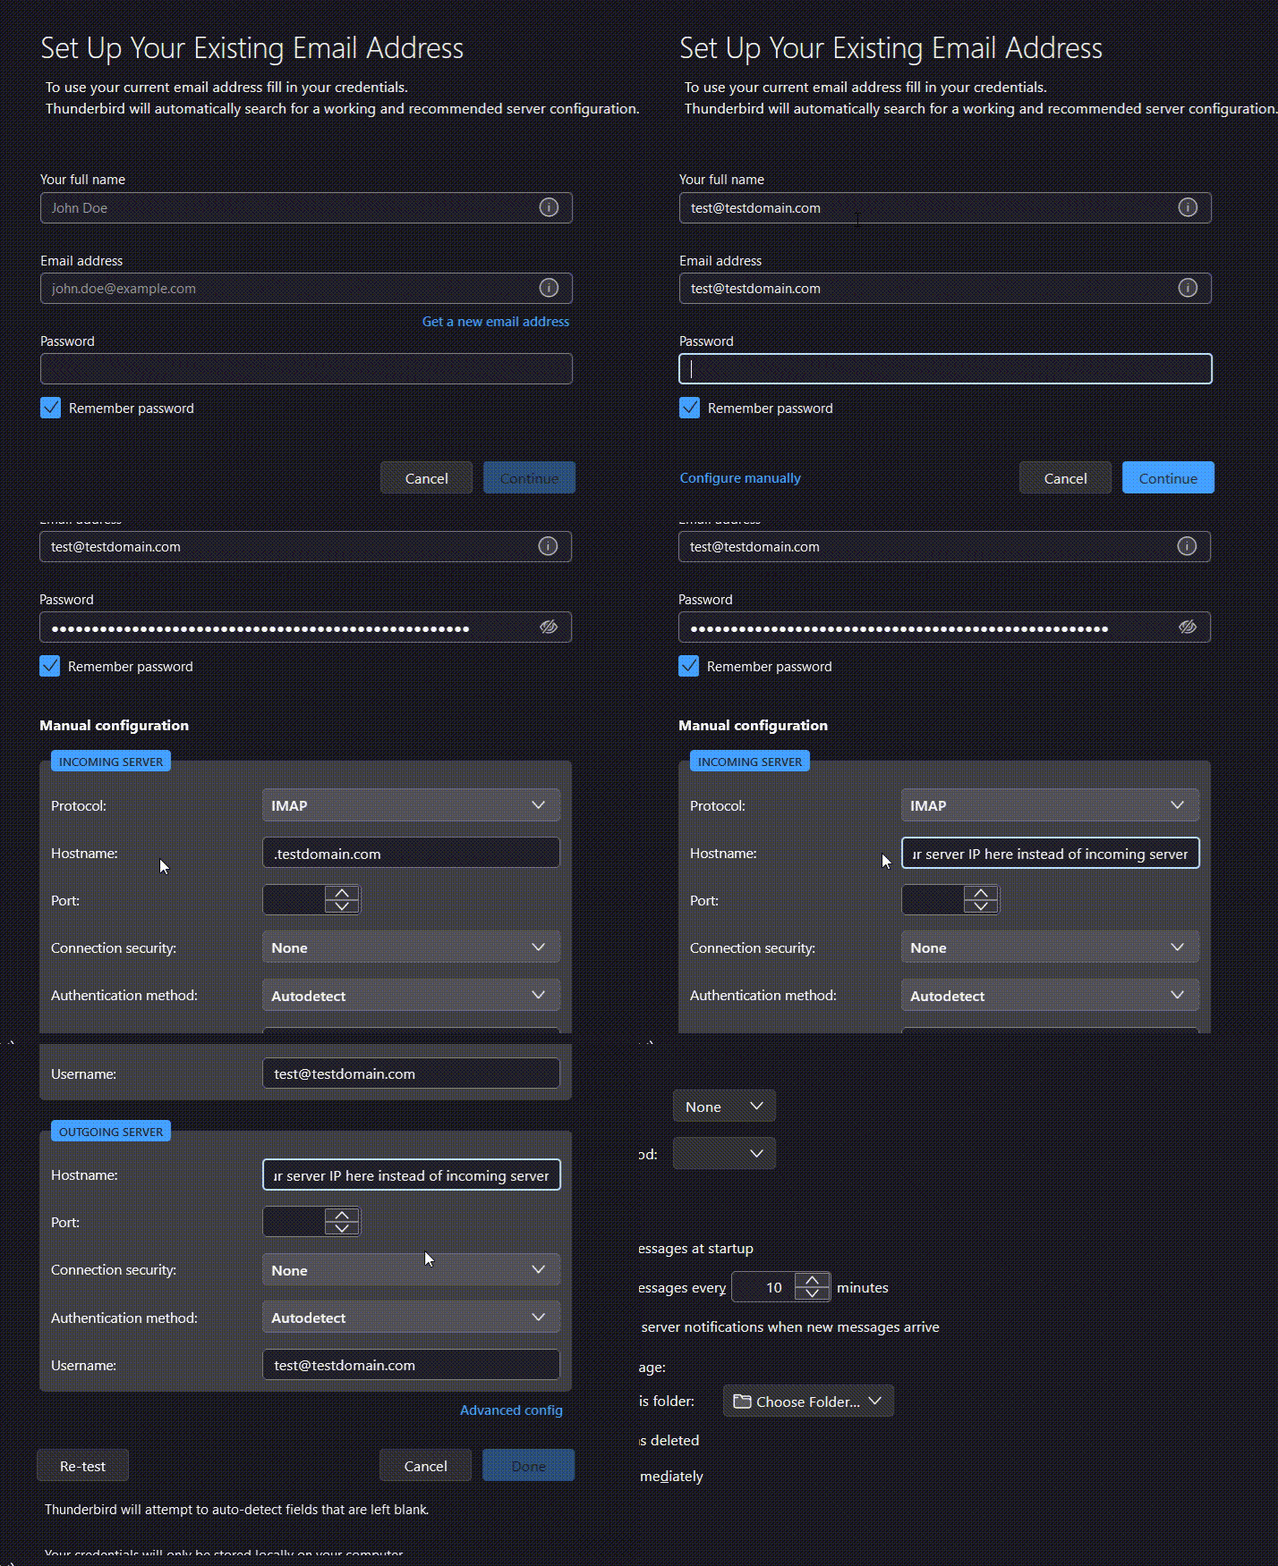
Your cPanel inbox is successfully configured!
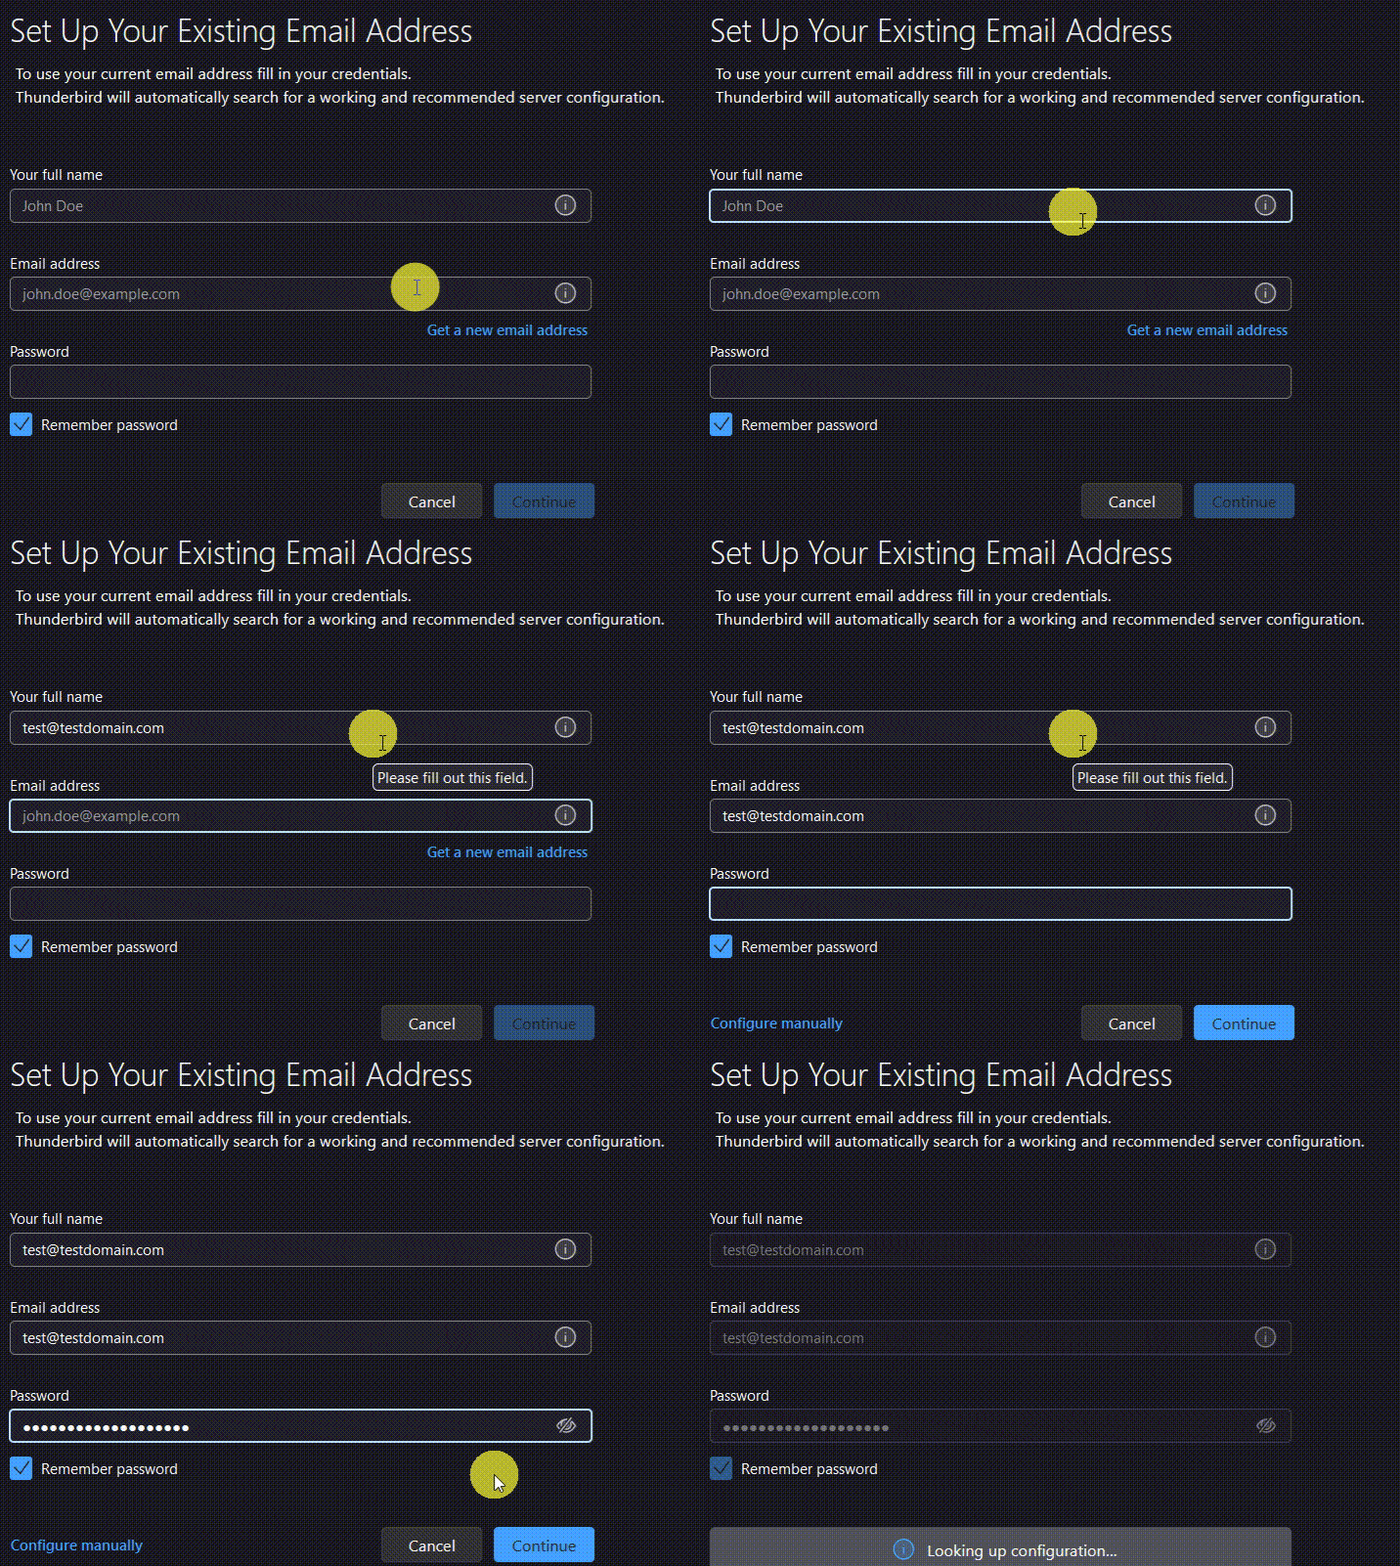
To configure the Plesk inbox to the mail client, simply enter your Name, Email Address, and Password in the respective fields, and click the “Continue” button. If the domain is correctly configured to the correct DNS in the domain registrar, Thunderbird will attempt to find the settings for your email account automatically.
Migrating Mails to New Inbox
Once you have set up both mail accounts successfully, simply select all emails from the Plesk server using the keyboard shortcut Ctrl + A, and drag them to the desired destination mail inbox. This will initiate the migration process of the emails to the new inbox.
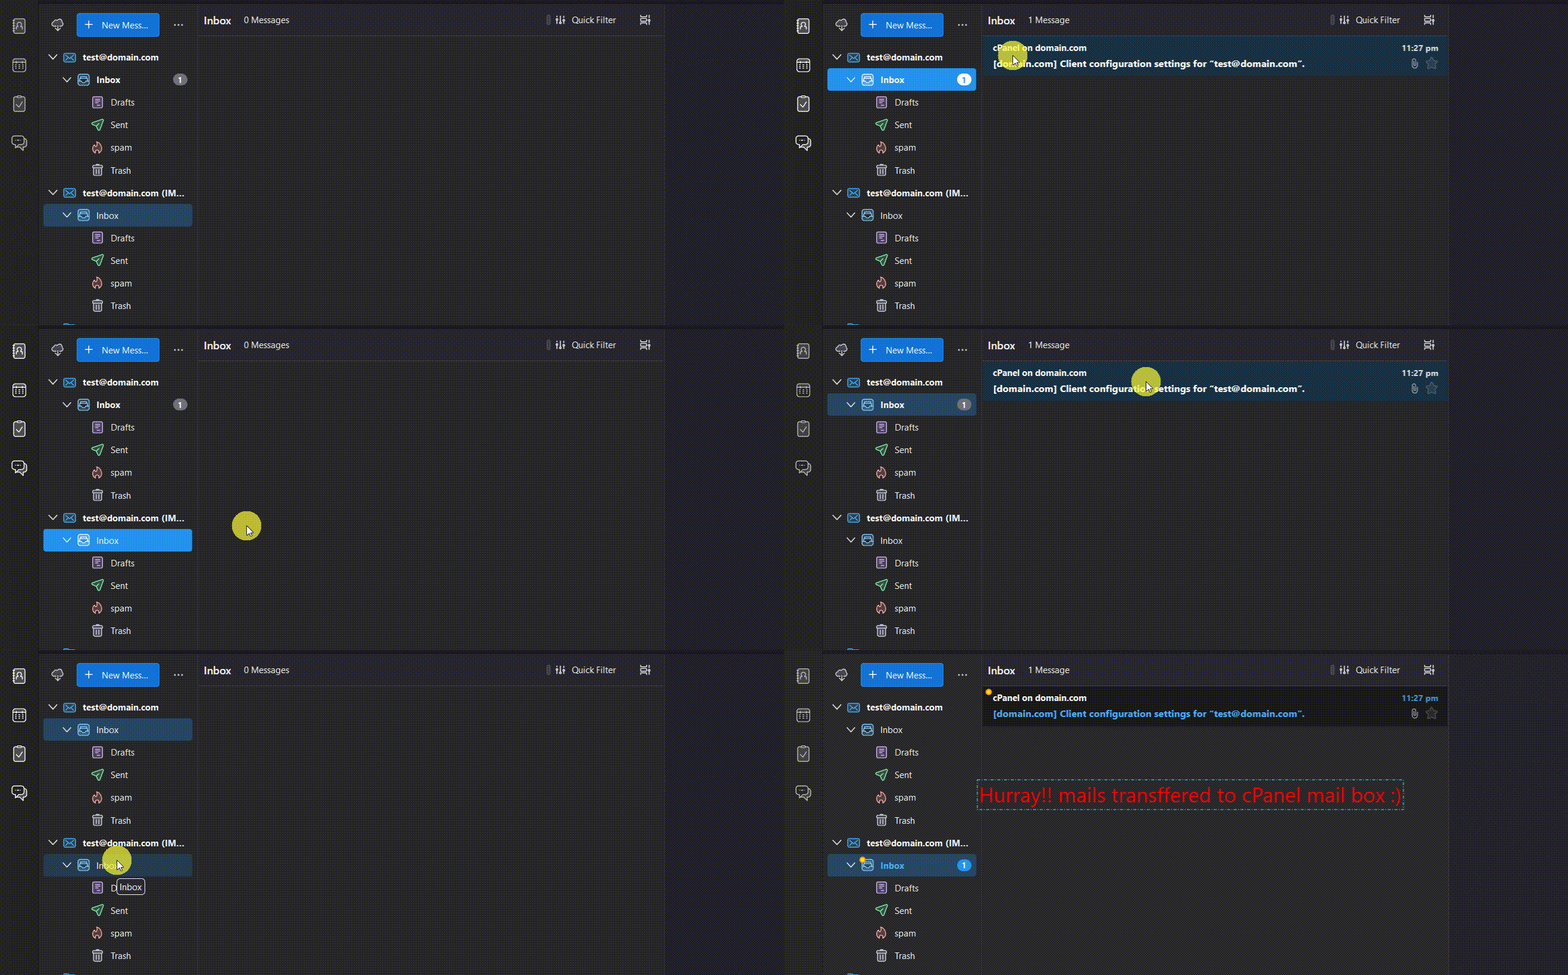
Confirming a successful data transfer you should next update the MX records to point to your new cPanel server via your Domain registrar of the domain. This approach minimizes downtime and ensures a seamless shift for both you and your email users.
If you’ve followed this tutorial, your emails should now be successfully migrated, setting the stage for a fresh start on cPanel with minimal disruption.
Considering a move from Plesk to cPanel? Let us streamline the process for you. Our cPanel hosting services at Veeble.org include a hassle-free migration handled by our experts. Discover our solutions and enjoy a seamless transition without lifting a finger.
