Xen VPSs are currently less favored in the market due to their higher maintenance costs in comparison to KVM servers. Consequently, transitioning your personal or client’s Xen VPS to KVM VPS without any data loss becomes an essential and cost-effective endeavor.
This knowledge base provides a detailed guide for migrating a Windows VPS from Xen to KVM virtualization. The process involves several steps, including creating a new KVM VPS, copying data from the source Xen VPS, and ensuring compatibility by removing Xen-specific drivers and configurations.
While these instructions are tailored to the SolusVM control panel, keep in mind that the steps may vary slightly for other control panels.
Here are the steps for migrating a VPS from Xen to KVM:
1. Begin by creating a new KVM VPS that matches the resources of the source Xen VPS. Add an extra 2GB space to the new VM as there may be chances for failure if you assign the same storage space for the new VM.
2. Find the path to the source image from the XEN server via the following command:
cat /home/xen/vmID/vmID.cfg | grep ^disk | awk -F '= ' {'print $2'} | awk -F ',sda1' {'print $1'} | awk -F ':' {'print $2'}
3. Find the path to the destination image from the KVM server via the following command:
virsh domblklist kvmID
4. Stop both the source Xen VPS and the newly created KVM VPS via the control panel you use. To shutdown via main servers, use the commands:
xl shutdown VMNAME // for xen VPS
virsh shutdown VMNameOrID // for KVM VPS
5. Copy the source VPS image into the KVM VPS image by running the following command on the KVM node:
ssh username@ipaddress "dd if=/path_to_source_image bs=4096k" | dd of=/path_to_destinaton_image bs=4096k
6. Access recovery mode on the destination VPS by attaching an ISO file to the CDROM drive of the respective VPS. Once the ISO is attached, set the VPS boot order to the CDROM drive as the first boot device. Additionally, you can set the NIC card to be Realtek or Intel and the Disk driver to be ide.
7. Initiate a server reboot, access the destination VPS via VNC, and during the reboot process, enter the Windows installation screen by pressing any key. Subsequently, proceed by clicking the “Install” button on the Windows installation screen.
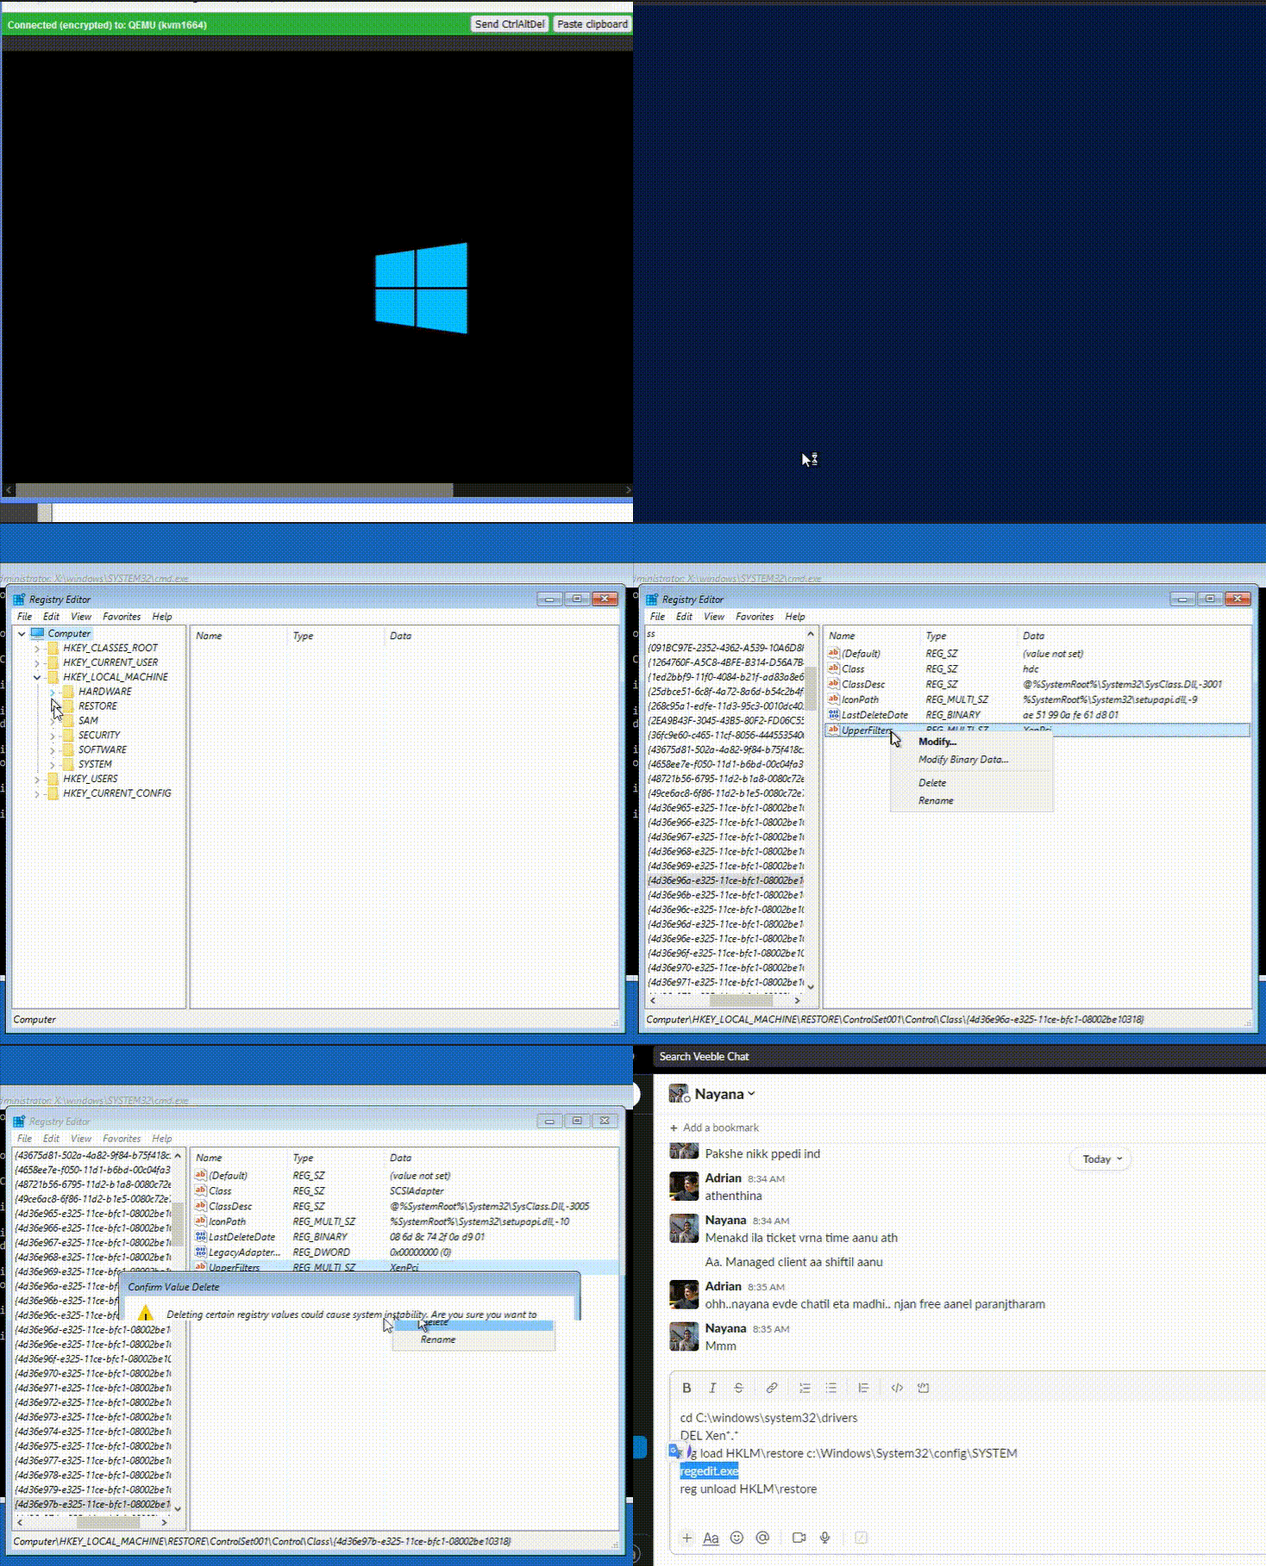
8. Execute the following commands to remove all Xen-specific drivers:
C:
cd C:\windows\system32
DIR Xen.
DEL Xen.
cd drivers
DIR Xen.
DEL Xen.
9. Load the registry hive:
reg load HKLM\restore c:\Windows\System32\config\SYSTEM
10. Launch the Registry Editor:
regedit.exe
11. Search for “XEN” (CTRL+F) under the location HKEY_LOCAL_MACHINE\restore\ControlSet001\Control\Class. Delete the UpperFilters keys containing “XEN.” Additionally, search for “UpperFilters -> XEN” in the registry and delete all entries with the “XEN” value.
12. Completely remove the following registry entries if present:
HKEY_LOCAL_MACHINE\restore\ControlSet001\Services\XEN
HKEY_LOCAL_MACHINE\restore\ControlSet001\Services\xenbus
HKEY_LOCAL_MACHINE\restore\ControlSet001\Services\xendisk
HKEY_LOCAL_MACHINE\restore\ControlSet001\Services\xenfilt
HKEY_LOCAL_MACHINE\restore\ControlSet001\Services\xeniface
HKEY_LOCAL_MACHINE\restore\ControlSet001\Services\xenlite
HKEY_LOCAL_MACHINE\restore\ControlSet001\Services\xennet
HKEY_LOCAL_MACHINE\restore\ControlSet001\Services\XenSvc
HKEY_LOCAL_MACHINE\restore\ControlSet001\Services\xenvbd
HKEY_LOCAL_MACHINE\restore\ControlSet001\Services\xenvif
Note: Some of these locations may be absent, so ensure to delete any existing entries.
13. Close the Registry Editor and unload the registry hive:
reg unload HKLM\restore
14. Unmount the ISO and change the boot order to Hard disk.
15. Finally, reboot the VPS within the SolusVM control panel.

By following these steps, you can successfully migrate your VPS from Xen to KVM virtualization while ensuring compatibility and removing Xen-specific components.